Table of Contents
Nothing ruins a low-and-slow barbecue session quite like unexpected flare-ups turning your perfectly seasoned brisket into a charred disappointment. These sudden bursts of intense heat not only threaten your food but can also damage your equipment and create genuine safety hazards. Vertical smokers, with their compact design and efficient heat distribution, have become increasingly popular among barbecue enthusiasts, but their unique configuration requires specific knowledge to manage grease and prevent those dreaded flame-ups.
Understanding how to eliminate flare-ups while maximizing the flavor potential of your vertical smoker will transform your outdoor cooking experience in 2026 and beyond. This comprehensive guide explores the essential features, techniques, and maintenance protocols that keep your smoker performing safely and consistently. Whether you’re considering your first vertical smoker or looking to master your current setup, you’ll discover practical strategies for managing heat, controlling grease, and achieving that perfect smoke ring without the fire department getting involved.
Top 10 Vertical Smokers
Detailed Product Reviews
1. EAST OAK Ridgewood Pro 30" Electric Smoker Built-in Meat Probe & Elevated Stand for Outdoors Up to 6× Longer Smokes, Adjustable Side Chip Loader Smoke with 725 sq in Cooking Area, Night Blue

Overview: The EAST OAK Ridgewood Pro redefines convenience in electric smoking with its ergonomic elevated stand and extended smoke duration. This 30-inch unit delivers 725 square inches of cooking space, making it ideal for serious barbecue enthusiasts who prioritize both comfort and performance. The Night Blue finish adds a premium aesthetic to any outdoor cooking space.
What Makes It Stand Out: The six-times longer smoke duration per wood chip load eliminates constant monitoring and refilling, while the elevated stand raises the smoker to waist height—saving your back during all-day sessions. The built-in meat probe provides real-time internal temperature tracking and automatically switches to keep-warm mode when targets are reached, preventing overcooking.
Value for Money: Priced in the mid-to-high range, this smoker justifies its cost through time-saving features and build quality. The ergonomic design alone adds significant value for users who smoke frequently, reducing physical strain. Compared to basic models requiring constant attention, the premium pays for itself in convenience and fuel efficiency.
Strengths and Weaknesses: Pros: Extended smoke sessions reduce interruptions; elevated stand improves accessibility; precise meat probe with auto-shutoff; side chip loader maintains temperature; ample cooking capacity. Cons: Premium price point may deter casual users; Night Blue color won’t suit all patios; larger footprint requires dedicated space; slightly heavier than standard models due to stand.
Bottom Line: The Ridgewood Pro excels for dedicated smokers seeking comfort and consistency. If you value ergonomic design and hands-off operation for long cooks, this is worth the investment.
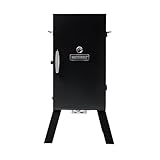
2. Masterbuilt® 30-inch Digital Electric Vertical BBQ Smoker with Leg Kit, Side Wood Chip Loader and 710 Cooking Square Inches in Black, Model MB20070421
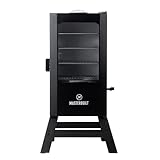
Overview: Masterbuilt’s 30-inch digital smoker delivers reliable performance in a compact vertical design. Offering 710 square inches across four chrome-coated racks, this model targets beginners and intermediate users who want set-it-and-forget-it simplicity without premium pricing. The black finish provides a classic, versatile look.
What Makes It Stand Out: The patented side wood chip loader is the star feature, allowing smoke flavor enhancement without heat loss. Digital controls simplify temperature and time management up to 275°F, while the vertical configuration maximizes capacity in a minimal footprint. The included leg kit elevates the unit for easier access.
Value for Money: This smoker hits the sweet spot for budget-conscious buyers wanting brand reliability. While lacking advanced features like meat probes or extended smoke times, it offers core functionality at a competitive price point. It’s an excellent entry-level option that doesn’t sacrifice build quality for affordability.
Strengths and Weaknesses: Pros: Affordable pricing; reliable brand reputation; side chip loader preserves heat; straightforward digital controls; space-efficient vertical design; easy assembly. Cons: No built-in meat probe requires separate purchase; shorter smoke duration demands frequent chip reloading; limited temperature range; chrome racks may require extra maintenance.
Bottom Line: Perfect for newcomers to smoking who want proven performance without complexity. If you’re testing the waters of low-and-slow cooking, this delivers solid results at a fair price.
3. Masterbuilt® 40-inch Digital Electric Vertical BBQ Smoker with Leg Kit, Side Wood Chip Loader and 970 Cooking Square Inches in Black, Model MB20070122

Overview: This 40-inch Masterbuilt scales up the brand’s proven formula to serious batch-cooking levels. With 970 square inches across four racks, it accommodates up to 16 chickens or 8 racks of ribs simultaneously. The same reliable digital controls and side loader system make it familiar for existing Masterbuilt users needing more capacity.
What Makes It Stand Out: The massive cooking area sets this apart, offering 37% more space than its 30-inch sibling while maintaining the same footprint efficiency. The side wood chip loader and digital panel remain user-friendly, and the vertical design ensures even heat distribution for large quantities. It’s built for feeding crowds consistently.
Value for Money: The price jump from the 30-inch model is justified if you regularly cook for large groups. For occasional entertainers, it may be overkill. Compared to competitors with similar capacity, Masterbuilt’s reputation and feature set offer strong value, though the lack of a meat probe is disappointing at this tier.
Strengths and Weaknesses: Pros: Exceptional capacity for large gatherings; maintains compact vertical footprint; reliable side chip loader; sturdy construction; consistent temperature control. Cons: No meat probe included; consumes more wood chips due to size; heavier and less portable; premium price without premium features; requires significant storage space.
Bottom Line: Ideal for large families, party hosts, or meal prep enthusiasts who prioritize capacity over advanced tech. If you need volume and trust the Masterbuilt ecosystem, this delivers.
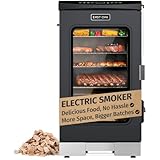
4. Vertical Electric Pellet Smoker with Cover & Meat Probe, 4-Rack Digital BBQ Electric Smokers, 616 Sq.in, LED Temperature Control, Ribs, Brisket, Chicken

Overview: This pellet-powered smoker differentiates itself from chip-based models with a 3-liter hopper enabling 20-hour continuous smoking. The 616-square-inch capacity with four movable racks and eight hooks provides versatility for various meats. An included weather-resistant cover adds immediate value for outdoor storage.
What Makes It Stand Out: The pellet system offers superior fuel efficiency and temperature stability compared to wood chip models. LED digital controls provide precise adjustments, while the built-in meat probe eliminates guesswork. The heavy-duty, rust-resistant steel construction with included cover makes it uniquely suited for harsh climates.
Value for Money: Competitively priced for a pellet smoker with included accessories. The cover alone saves $30-50, while the extended burn time reduces fuel costs long-term. Pellet smokers typically command higher prices than electric chip models, making this an accessible entry point to pellet smoking without sacrificing core features.
Strengths and Weaknesses: Pros: 20-hour pellet burn time; included protective cover; built-in meat probe; weather-resistant construction; precise LED temperature control; versatile rack and hook system. Cons: Smaller cooking area than similarly priced chip smokers; pellets cost more than wood chips; limited brand recognition; potential availability issues with replacement parts.
Bottom Line: An excellent choice for pellet-curious smokers in variable weather. If you want set-and-forget overnight cooks and need outdoor durability, this package delivers outstanding value.
5. EAST OAK 30" Electric Smoker for Outdoors | Built-in Meat Probe & Clear Viewing Window | Side Chip Loader for 6x Longer Uninterrupted Smoking | 725 sq in Cooking Area for Bigger Batches, Night Blue
Overview: This EAST OAK model shares the Ridgewood Pro’s core technology but trades the elevated stand for a clear viewing window. The same 725-square-inch capacity and six-times extended smoke duration remain, making it a feature-rich option for users who prioritize monitoring over ergonomic height. The Night Blue finish continues the premium aesthetic.
What Makes It Stand Out: The viewing window allows visual progress checks without opening the door, complementing the side chip loader’s heat retention. The extended smoke duration and built-in meat probe with auto-warm functionality mirror the Pro model’s convenience. It’s essentially the Ridgewood Pro adapted for users comfortable with standard-height operation.
Value for Money: Slightly less expensive than the Ridgewood Pro, this offers nearly identical features minus the stand. For the price difference, you could purchase a separate table or stand if needed. The viewing window adds value for visual learners, though it may fog during long cooks. It competes strongly with premium models lacking extended smoke capabilities.
Strengths and Weaknesses: Pros: Viewing window enables visual monitoring; same extended smoke duration as Pro model; built-in meat probe with auto-shutoff; generous cooking capacity; side chip loader maintains temperature. Cons: No elevated stand means bending and kneeling; window requires cleaning to remain functional; Night Blue color limits aesthetic options; premium pricing despite stand omission.
Bottom Line: A smart compromise for those wanting EAST OAK’s extended smoke technology without the Pro model’s full premium. If you can handle standard-height operation, the viewing window is a worthwhile trade-off.
6. Propane Smoker with Cover, Vertical Meat Gas Smoker Grill Outdoor Heavy Duty 3 Removable Smoking Racks, Black

Overview: The Propane Smoker with Cover is a vertical gas smoker designed for enthusiasts seeking convenience without sacrificing performance. Featuring three removable smoking racks, a compact footprint, and a heavy-duty black finish, this unit fits most patios while delivering robust smoking capabilities. The included cover adds immediate value for outdoor storage protection.
What Makes It Stand Out: This smoker’s exceptional build quality shines through its tightly sealed door that locks in smoke and heat. The ingenious rail system allows grate adjustment to accommodate various meat sizes, while extra-wide racks promote superior airflow. Most impressive are the external-access water and wood chip trays—you can replenish without opening the main chamber, minimizing heat loss and maintaining consistent temperatures throughout long cooks.
Value for Money: Positioned as a mid-range propane smoker, its heavy-duty construction and thoughtful features justify the investment. The included cover, typically a $30-50 add-on, enhances value. While propane costs add up over time, the convenience and consistent heat outweigh the expense compared to charcoal alternatives that demand constant tending.
Strengths and Weaknesses: Pros include outstanding heat retention, smart tray design, adjustable racks, and durable construction. The three-rack capacity suits most families but falls short for large gatherings. The lack of specified temperature range and BTU rating leaves some performance questions. Propane dependency means you’ll need a tank on hand.
Bottom Line: Ideal for dedicated beginners and intermediate smokers prioritizing convenience and build quality. The external-access trays and sealed design make it a reliable choice for consistent results, though serious competitors may want more capacity.
7. Masterbuilt® 30-inch Electric Vertical BBQ Smoker with Analog Temperature Control, Chrome Smoking Racks and 535 Cooking Square Inches in Black, Model MB20070210
Overview: Masterbuilt’s 30-inch Electric Smoker offers a straightforward introduction to smoking with its analog temperature control and 535 square inches of cooking space across three chrome-coated racks. This electric model eliminates fuel management complexities, making it accessible for novices while delivering consistent low-and-slow performance up to 275°F.
What Makes It Stand Out: The analog dial control provides refreshingly simple operation without digital components that can fail. Electric heating ensures steady temperatures with minimal babysitting, while the removable wood chip tray and water bowl allow flavor customization and moisture retention. Its vertical design efficiently uses space, accommodating three chickens or two turkeys simultaneously.
Value for Money: As an entry-level electric smoker, it competes aggressively on price. The electric operation costs pennies per hour compared to propane or charcoal. However, the 275°F maximum temperature limits versatility—no crispy chicken skin or higher-heat applications. You’re trading ultimate flavor authenticity for convenience and affordability.
Strengths and Weaknesses: Pros include push-button simplicity, consistent heat, low operating costs, and easy cleanup. The chrome racks resist rust but aren’t as durable as stainless steel. The analog control lacks precision, and the temperature ceiling restricts some recipes. Electric dependency means it’s not ideal for remote locations without power.
Bottom Line: Perfect for apartment dwellers or beginners wanting hassle-free smoking. It delivers reliable results for basic smoking tasks, but enthusiasts will quickly outgrow its temperature limitations and crave more authentic smoke flavor.
8. Pit Boss 3-Series Gas Vertical Smoker, Red Hammertone - 10773

Overview: The Pit Boss 3-Series Gas Vertical Smoker brings serious capacity and precision to propane smoking. With 880 square inches across four porcelain-coated racks, this red hammertone unit handles large quantities while offering an impressive 100°F to 320°F temperature range. The dual-burner system provides nuanced heat control for everything from delicate fish to crispy-skinned poultry.
What Makes It Stand Out: Dual 12,500 BTU burners with independent control deliver exceptional temperature precision, eliminating hot spots common in single-burner designs. The wide temperature spectrum supports cold smoking and high-heat finishing. Piezo ignition ensures reliable starts, while the sturdy construction reflects Pit Boss’s reputation for durability. The 14.75" x 12.25" racks accommodate full racks of ribs without bending.
Value for Money: This premium-priced smoker justifies its cost through superior capacity and control. The dual-burner system rivals more expensive cabinet smokers. While propane expenses accumulate, the efficiency and time savings offset fuel costs for serious users. It’s an investment for regular smokers, not occasional dabblers.
Strengths and Weaknesses: Pros include massive cooking area, excellent temperature range, dual-burner precision, and robust build quality. The red finish may not suit all aesthetics. At 880 square inches, it demands significant patio space. Some users report the water tray needs frequent refilling during extended cooks.
Bottom Line: A top-tier choice for committed smoking enthusiasts needing capacity and versatility. The dual-burner control and wide temperature range make it worth the premium, though casual users may find it excessive.
9. Propane Smoker, Vertical Smoker with Three Removable Shelves,Outdoor Grills & Smokers with Thermometer for BBQ, Backyard,Black…

Overview: This Vertical Propane Smoker targets enthusiasts seeking robust construction and convenient operation. With three removable shelves, a compact footprint, and a large smoking chamber, it handles backyard BBQ duties effectively. The integrated thermometer provides at-a-glance monitoring, while the black finish blends discreetly into outdoor settings.
What Makes It Stand Out: The heavy-duty door seal excels at trapping smoke, crucial for flavor development. Its standout feature remains the external-access water and wood chip trays, allowing mid-cook replenishment without heat loss. The ingenious rail system offers adjustable grate spacing, accommodating everything from brisket to beer-can chicken. Extra-wide racks ensure proper airflow around meat for even smoking.
Value for Money: This mid-range smoker delivers solid construction typically found in pricier models. The included thermometer adds value, though its accuracy may vary. While propane costs are ongoing, the convenience factor justifies the expense over charcoal alternatives. It competes directly with similar units but distinguishes itself through thoughtful engineering.
Strengths and Weaknesses: Pros include excellent heat retention, smart tray design, adjustable shelving, and sturdy build. The three-shelf capacity suffices for most families but limits large-batch smoking. Temperature control can be finicky in windy conditions. Unlike some competitors, a cover isn’t mentioned as included. Propane dependency requires tank management.
Bottom Line: A reliable workhorse for regular smokers prioritizing convenience and durability. The external-access trays and sealed design produce consistent results, making it ideal for intermediate users ready to move beyond entry-level equipment.
10. Oklahoma Joe’s Bandera Smoker and Grill

Overview: Oklahoma Joe’s Bandera Smoker and Grill represents the charcoal purist’s approach to vertical smoking. This heavy-gauge steel offset smoker delivers 744 square inches of primary cooking space plus 248 square inches of secondary grilling surface. The height-adjustable charcoal tray transforms it from low-and-slow smoker to high-heat grill, offering remarkable versatility.
What Makes It Stand Out: The vertical offset design creates natural heat and smoke convection, producing authentic BBQ flavor electric and propane units can’t match. The adjustable charcoal tray provides precise heat management—raise it for searing steaks, lower it for 12-hour brisket sessions. Heavy-gauge steel construction ensures durability and heat retention, while the professional temperature gauge offers accurate monitoring.
Value for Money: Positioned as a premium charcoal unit, its price reflects build quality and versatility. There’s no fuel cost beyond charcoal and wood, but time investment is significant. For purists, the flavor superiority justifies the learning curve. It replaces both smoker and grill, potentially saving money long-term.
Strengths and Weaknesses: Pros include authentic smoke flavor, dual-function design, robust construction, and excellent heat control once mastered. Cons involve a steep learning curve, charcoal management demands, and substantial footprint. Temperature fluctuations challenge beginners, and the offset design requires occasional fire tending.
Bottom Line: Best suited for BBQ traditionalists willing to master fire management. The Bandera rewards patience with unparalleled flavor and flexibility, but casual users should consider easier alternatives. It’s a serious tool for serious cooks.
Understanding Flare-Ups in Vertical Smokers
What Causes Flare-Ups?
Flare-ups occur when rendered fat and grease drip directly onto hot coals, heating elements, or flame sources, igniting into sudden, intense fires. In vertical smokers, the stacked design means gravity works against you, pulling grease downward toward the heat source. The combination of fatty meats, high temperatures, and accumulated drippings creates the perfect storm for these unpredictable bursts. Unlike traditional offset smokers where heat and grease paths can be separated more easily, vertical units concentrate everything in one compact chamber, making management techniques critical for safe operation.
The Science Behind Grease Fires
Grease fires reach temperatures exceeding 500°F and spread rapidly through your cooking chamber. When animal fats heat beyond their smoke point, they vaporize and ignite, creating flames that travel upward through the smoker. This convection effect, normally beneficial for even cooking, becomes dangerous when uncontrolled combustion occurs. The rendered fat acts as fuel, and once ignited, it can coat your food with acrid smoke and create temperature spikes that ruin hours of careful temperature management. Understanding this chemical process helps you appreciate why prevention measures aren’t just convenient—they’re essential.
Why Vertical Smokers Are Prone to Flare-Ups
The very design that makes vertical smokers efficient also makes them susceptible to grease fires. Heat sources sit directly below the lowest cooking grate, often with minimal deflection. As meat cooks and fat renders, it drips straight down onto hot surfaces. The tall, narrow chamber creates a chimney effect that can intensify any flames that do start. Additionally, many vertical smokers pack multiple cooking levels into a small footprint, meaning grease from the top racks has to pass through lower cooking zones, multiplying the risk if proper management systems aren’t in place.
Types of Vertical Smokers and Flare-Up Prevention
Charcoal Vertical Smokers
Charcoal units offer authentic smoke flavor but require the most vigilance against flare-ups. The direct contact between dripping grease and glowing embers creates constant risk. Look for models with substantial water pan systems that create a complete barrier between the charcoal basket and cooking grates. The best designs position the charcoal in a separate, sealed chamber with side access doors, allowing you to add fuel without disturbing the cooking environment or exposing grease deposits to open flames. Ceramic or clay water pans provide better thermal mass and more complete coverage than thin metal alternatives.
Electric Vertical Smokers
Electric smokers generally present the lowest flare-up risk since they lack open flames, but they’re not immune. Heating elements can still reach temperatures sufficient to ignite grease, especially if they become coated with drippings over time. Premium electric models feature fully enclosed heating elements with drip shields that direct grease away from hot surfaces into dedicated collection channels. The most advanced designs use indirect heating, warming a separate metal plate or lava rocks that then radiate heat upward, eliminating direct contact between the element and any drippings while still maintaining consistent temperatures.
Gas Vertical Smokers
Propane smokers combine convenience with genuine flame cooking, placing them in the middle of the flare-up risk spectrum. The burner assembly typically sits beneath a lava rock or ceramic briquette tray that helps distribute heat but can become saturated with grease. Effective gas smokers incorporate angled drip trays above the burner assembly that channel grease to external collection cups. The burner itself should be protected by a robust heat diffuser that prevents drips from landing directly on the flame while still allowing proper combustion airflow. Multiple burner controls let you create cooler zones where grease can accumulate safely.
Pellet Vertical Smokers
Pellet smokers use an auger system to feed compressed wood pellets into a small fire pot, offering set-it-and-forget-it convenience. While the fire pot gets extremely hot, it’s typically small and located in a separate burn chamber. The best designs include a solid metal baffle between the fire pot and cooking chamber, with a sloped grease tray that directs drippings into a large-capacity bucket. Since pellet smokers rely on convection fans for heat distribution, ensuring the grease tray completely covers the fire pot opening is critical—any gaps allow grease to reach the super-heated fire pot, creating instant ignition.
10 Critical Features for Flare-Up Prevention
A comprehensive grease management system forms your first line of defense. This includes sloped interior surfaces that direct drippings toward collection points, removable grease trays with high sides, and external collection cups you can empty without opening the cooking chamber. The system should handle at least 2-3 cups of rendered fat from a single long cook. Look for seamless, welded channels rather than screwed-together components that can leak. The best designs allow you to line collection trays with foil for easy cleanup, encouraging more frequent maintenance.
The water pan serves dual purposes: adding moisture to prevent meat drying and acting as a critical heat shield. Optimal placement sits at least 6-8 inches below the lowest cooking grate, creating a buffer zone where grease can cool before potentially reaching hot surfaces. The pan should hold a minimum of 4 quarts to last through 6-8 hour cooks without refilling. Wide, shallow pans provide better coverage than deep, narrow ones. Some advanced models feature segmented water pans, allowing you to add flavoring liquids or create partial barriers for different cooking zones.
Modern vertical smokers incorporate dedicated heat shields or diffusers that sit between the heat source and cooking chamber. These perforated metal plates distribute heat evenly while blocking direct flame contact. The shield should be removable for cleaning but sturdy enough to handle frequent removal. Look for angled designs that actively direct grease toward collection points rather than flat plates where grease can pool. Some premium models use ceramic-coated shields that resist grease adhesion and wipe clean easily after cooling.
Proper ventilation prevents the buildup of flammable grease vapors. Adjustable intake vents at the bottom and exhaust dampers at the top let you control oxygen flow, reducing the intensity of any potential flare-ups while maintaining clean smoke circulation. The vent system should be easy to adjust mid-cook without specialized tools. Look for smokers with multiple intake vents that can be partially closed to create a less aggressive fire when cooking particularly fatty foods. The exhaust damper should be positioned to draw smoke evenly through all cooking levels.
Drip pans must be easy to access, remove, and clean—if they’re difficult to reach, you’ll avoid emptying them, increasing fire risk. The best designs position drip pans at the very bottom of the unit with front-access doors. Slide-out designs are preferable to lift-out pans that require you to reach into the smoker. Handles should be heat-resistant and positioned to avoid grease drips when removing. Consider the pan’s capacity relative to your typical cook sizes; a full brisket can render over a cup of fat, so plan accordingly.
Cooking grates should be spaced at least 6 inches apart vertically, giving grease room to fall without splattering on lower foods. The grates themselves should have a coating that resists grease adhesion—porcelain-enameled or chrome-plated surfaces release drippings better than raw cast iron. Removable grates make thorough cleaning between cooks practical. Some advanced designs feature angled grates that direct drippings toward the center and away from the smoker walls, concentrating grease management in one predictable path.
Double-wall insulated construction maintains stable temperatures with less fuel, reducing temperature fluctuations that can contribute to flare-ups. The insulation also keeps exterior surfaces cooler, making the unit safer to operate. While less directly related to flare-ups, this stability prevents the heat spikes that can ignite accumulated grease. Look for smokers with tight-sealing doors that prevent oxygen leaks, which can feed potential fires. Magnetic door seals often perform better than simple latches alone.
Accurate temperature monitoring lets you catch dangerous spikes before they become full flare-ups. Multiple gauges positioned at different cooking levels provide better insight than a single top-mounted thermometer. Digital probes with remote monitoring capabilities alert you to temperature changes even when you’re away from the smoker. The gauges should be positioned away from direct heat source influence but in the main airflow path. Consider models with replaceable probes, as these components do fail over time.
In charcoal and pellet smokers, ash buildup can block airflow and create hot spots that ignite grease. Effective ash management includes removable ash catchers or drawers that can be emptied without dumping the entire smoker. The system should prevent ash from blowing up onto food while still allowing complete combustion. For pellet smokers, the fire pot should have an automatic ash cleanout cycle or be easily accessible for manual cleaning between cooks. Ash buildup exceeding half an inch significantly increases flare-up risk.
The interior finish affects how easily you can remove grease buildup. High-temperature porcelain coatings resist grease penetration and wipe clean with minimal effort. Bare steel interiors require more aggressive scraping and are more likely to harbor hidden grease deposits in scratches and pits. Some emerging 2026 models feature ceramic-based non-stick coatings specifically designed for smoker interiors, making post-cook cleanup so simple you’ll do it more often—a critical factor in flare-up prevention.
Proper Setup to Eliminate Flare-Ups
Pre-Seasoning Your Smoker
Before first use, season your smoker by coating interior surfaces with cooking oil and running it at 250-275°F for 2-3 hours. This process creates a protective layer that resists grease adhesion and prevents rust. Use a high-smoke-point oil like grapeseed or canola, applying a thin coat with a rag to all interior surfaces except heating elements. This initial seasoning also burns off manufacturing residues. Re-season your smoker annually or after deep cleaning to maintain this protective barrier.
Strategic Water Pan Placement
Fill your water pan with hot water before starting the smoker—cold water drops the temperature and extends preheating time. Position the pan to completely cover the area beneath your lowest cooking grate, leaving no gaps where grease can bypass the water barrier. For extra-long cooks, consider adding a water pan on a second level if your smoker design allows it. Some pitmasters place a layer of washed river rocks in the water pan to increase thermal mass and stabilize temperatures further.
Drip Pan Configuration
Line your primary drip pan with heavy-duty aluminum foil for easy cleanup, but ensure the foil doesn’t block drainage holes. Place a disposable foil pan on the lowest grate position when cooking extremely fatty foods like pork belly or duck, adding an extra collection layer. Angle the drip pan slightly toward the drainage outlet using small metal washers or nuts beneath one side—most manufacturers design them this way, but double-check with a level. Empty the drip pan when it’s half full during long cooks, using heat-resistant gloves and a stable container.
Fuel Arrangement Techniques
For charcoal smokers, use the Minion Method—placing unlit charcoal in the basket and adding a small amount of lit coals on top. This creates a slow, controlled burn that generates less intense heat than lighting all charcoal at once. Arrange charcoal in a ring around the perimeter rather than a solid mass, creating a cooler center zone where grease can drip with less ignition risk. For gas smokers, keep one burner completely off to create a safe zone where grease can accumulate without direct flame contact.
Cooking Techniques That Prevent Flare-Ups
Temperature Management Strategies
Maintain temperatures between 225-250°F for most smoking applications—this range renders fat slowly without creating the intense heat needed for ignition. Avoid opening the door frequently, as oxygen influx feeds potential flare-ups. If temperatures spike above 275°F, partially close intake vents and adjust exhaust dampers to restrict airflow. Learn your smoker’s personality; each unit has hot spots you can map by moving temperature probes around during test runs. Cook fattier foods on upper racks when possible, giving grease more distance to cool before reaching the heat source.
Food Placement Guidelines
Position fatty foods like pork shoulder and brisket on upper cooking grates, allowing rendered fat to drip through cooler air zones before potentially reaching heat sources. Place leaner proteins like chicken breasts or fish on lower racks. When cooking multiple fatty items, stagger them vertically so drips from above don’t land directly on food below—offset the placement by 180 degrees between racks. Use drip trays beneath particularly fatty foods, even with good internal grease management. Leave at least 2 inches between individual pieces of meat to prevent grease from pooling on food surfaces.
Managing Fatty Cuts of Meat
Trim external fat caps to 1/4-inch thickness before cooking—this reduces total grease volume while retaining moisture. Score the fat cap in a crosshatch pattern to help it render more evenly rather than in large, sudden releases. Consider wrapping fatty cuts in butcher paper after 4-5 hours once they’ve developed a good bark; this contains further grease release while still allowing smoke penetration. For extremely fatty meats like beef short ribs, place them in aluminum pans for the first half of the cook, then transfer to grates once most surface fat has rendered.
The Minion Method for Charcoal
The Minion Method isn’t just for temperature control—it reduces flare-ups by limiting the amount of hot fuel available at any time. Place a large foil pan in the center of your charcoal basket and arrange unlit charcoal around it. Add 10-15 lit coals to one edge. As the lit coals slowly ignite their neighbors, you get a controlled, gradual burn. The central foil pan catches grease before it reaches any charcoal. This method can maintain 225°F for 8-12 hours without adding fuel, eliminating the need to open the smoker and risk flare-ups.
Maintenance Protocols for Flare-Up Prevention
Deep Cleaning Schedule
Perform a deep clean after every 3-4 cooks or monthly during heavy use. Remove all grates, water pans, and drip trays, scrubbing them with a grill brush and degreasing solution. Use a plastic scraper on interior walls to remove built-up creosote and grease deposits—metal scrapers can damage protective coatings. Clean the temperature probes with rubbing alcohol to ensure accurate readings. For pellet smokers, vacuum the fire pot and interior ash completely. This level of cleaning takes 45-60 minutes but prevents the accumulation that causes major flare-ups.
Grease Removal Best Practices
Never use water to extinguish a grease fire—this causes explosive steam and spreads burning grease. Instead, keep a metal lid or baking sheet nearby to smother flames by cutting off oxygen. For routine grease removal, wait until the smoker cools to 150°F or below, then remove collection trays carefully to avoid spills. Pour cooled grease into a sealed container, not down drains. Wipe interior surfaces with paper towels before washing to remove the bulk of grease—this prevents washing large amounts of fat into your plumbing. Use a dedicated grease-cutting cleaner like Simple Green or a homemade solution of hot water and dish soap.
Post-Cook Maintenance Routine
After each cook, while the smoker is still warm (but safe to touch), scrape grates with a brass-bristle brush to remove food particles and grease. Empty and wipe the water pan to prevent rancid oil buildup. Check the drip pan and empty if more than half full. Wipe door seals with a damp cloth to ensure they maintain a tight seal. This 10-minute routine prevents the accumulation that leads to problems. Leave the smoker door propped open after cleaning until completely cool to prevent moisture buildup and rust.
Seasonal Storage Preparation
Before storing your smoker for winter or extended periods, perform a deep clean and ensure all grease is removed, as it can become rancid and attract pests. Coat interior surfaces lightly with cooking oil to prevent rust. Remove and store temperature probes indoors to protect electronics. Cover the smoker with a breathable cover—plastic tarps trap moisture and cause rust. Store propane tanks separately in a well-ventilated area. For electric smokers, ensure all connections are dry and consider storing the control panel indoors if detachable.
Temperature Control Mastery
Understanding Heat Zones
Vertical smokers naturally create temperature gradients—typically 25-50°F hotter at the top than the bottom. Learn your specific model’s pattern by placing temperature probes at each cooking level during a test run with no food. Map these zones and use them strategically: cook poultry and other higher-temperature foods on upper racks, fish and vegetables lower. This knowledge also helps you identify where grease will be most likely to ignite. Some smokers have adjustable heat deflectors that let you redistribute heat more evenly.
Vent Adjustment Techniques
Start with your exhaust damper 100% open and intake vents 25% open for target temperatures of 225-250°F. Adjust intake vents in small increments—5% changes can shift temperatures by 15-20°F. Never close the exhaust damper below 50% open during active cooking; this traps stale smoke and can cause creosote buildup. If you see smoke coming from door seals, your exhaust is too restricted. During windy conditions, partially close the intake on the windward side to prevent temperature spikes that can ignite grease.
Using Thermal Mass
Add thermal mass to your smoker to stabilize temperatures and reduce fluctuations that contribute to flare-ups. Bricks wrapped in foil placed on the lowest rack above the water pan absorb heat and release it slowly. Some pitmasters use washed river rocks in the water pan for the same effect. This thermal mass acts as a buffer, preventing the rapid temperature climbs that can occur when airflow increases suddenly. The added mass also helps the smoker recover faster after door opening, reducing the time spent at dangerous temperatures.
Weather Considerations
Wind, ambient temperature, and precipitation dramatically affect smoker performance. On cold days, allow extra preheating time and consider using welding blankets or smoker jackets to retain heat—this prevents you from over-fueling to compensate. In windy conditions, position your smoker with the door facing away from prevailing winds to prevent pressure changes that can cause temperature spikes. Rain or snow can cool the smoker exterior, causing you to increase fuel, which then creates flare-up risk when weather clears. Always use a covered area or pop-up tent to protect the smoker from direct precipitation.
Safety Equipment and Emergency Protocols
Essential Fire Safety Tools
Keep a Class K fire extinguisher (specifically for grease fires) within 30 feet of your smoker but not directly next to it—if the smoker is engulfed, you need to access the extinguisher safely. Store a large container of baking soda nearby as an alternative smothering agent. Keep long-handled tongs and heat-resistant gloves accessible for moving food quickly if needed. A spray bottle filled with water can help control minor grease pops, but never use it on an established fire. A fire-resistant welding blanket can smother flames while protecting your hands.
Recognizing Danger Signs
Learn to identify pre-flare-up indicators: sudden temperature spikes of 50°F or more, visible smoke changes from thin blue to thick white or black, or the smell of burning grease rather than clean wood smoke. If you hear sizzling or popping sounds that increase in frequency, grease is likely reaching hot surfaces. The moment you see flames through the door glass or vent, take action—don’t wait to see if it “calms down.” These early warning signs give you 30-60 seconds to intervene before a minor issue becomes a major problem.
Emergency Shutdown Procedures
If a flare-up occurs, first close all intake vents and the exhaust damper to starve the fire of oxygen. Do not open the door—this feeds the fire. If flames are visible and growing, use your fire extinguisher or smother with a metal lid. For gas smokers, shut off the propane at the tank valve. For electric units, unplug from the outlet. For charcoal, close all vents and let it burn out safely. Evacuate the area if flames escape the smoker chamber. After any fire, inspect all components for damage before the next use, replacing any melted gaskets or warped metal.
Protective Gear Recommendations
Invest in quality heat-resistant gloves rated to at least 500°F for handling hot components during emergencies. Long-sleeved cotton shirts (never synthetic, which can melt) and closed-toe shoes protect against splatters. Safety glasses shield your eyes from grease pops when opening the door. Keep a first-aid kit with burn cream nearby. A headlamp helps you monitor the smoker at night without using your hands. While not directly preventing flare-ups, proper gear ensures you can respond safely if they occur.
Troubleshooting Persistent Flare-Up Issues
When Flare-Ups Keep Happening
If you’re experiencing flare-ups despite following best practices, systematically evaluate your setup. First, check that all grease management components are correctly positioned—sometimes drip trays shift during cooking. Inspect door seals for leaks that might be feeding oxygen to grease deposits. Test temperature gauge accuracy by comparing with a known-good digital probe. If using charcoal, you may be using too much lit fuel at startup. For gas smokers, verify burner orifices are clean and flames are even—partially clogged burners create hot spots.
Identifying Equipment Problems
Warped heat shields, cracked water pans, or damaged drip trays compromise your flare-up defenses. Check that heat shields sit level and cover the entire heat source opening. Inspect water pans for pinhole leaks that reduce their protective capacity. Look for rust spots on interior surfaces where grease can hide and accumulate. Damaged door seals create air leaks that feed fires. If your smoker is more than 5 years old, replace door gaskets annually as they compress and lose effectiveness. For pellet smokers, ensure the fire pot isn’t developing cracks that allow flame to bypass the grease tray.
Modifying Your Technique
Sometimes the solution isn’t equipment but method. Try cooking at 215°F instead of 225°F—this small reduction significantly decreases flare-up frequency while still producing excellent results. Rotate food between racks every 2-3 hours to prevent grease accumulation in one spot. Start fattier meats in pans for the first half of the cook, then transfer to grates. Reduce the amount of lit charcoal in the Minion Method from 15 to 10 briquettes. These micro-adjustments often solve persistent issues without equipment changes.
When to Seek Professional Help
If you’ve tried all adjustments and still experience dangerous flare-ups, consult the manufacturer about potential defects. Some units have design flaws that make safe operation difficult. Professional smoker repair services can identify issues like gas regulator problems or electrical faults in electric models. For older smokers, consider whether replacement makes more sense than continued repairs. A professional inspection costs $75-150 but can identify hidden problems that create safety risks. Never continue using a smoker that regularly produces uncontrolled flames—it’s not worth the risk to life and property.
Frequently Asked Questions
What immediate action should I take when a flare-up starts?
Close all vents and dampers immediately to cut off oxygen, then close the door and do not open it for at least 10 minutes. If flames are visible and growing, use a Class K fire extinguisher or smother with a metal lid. Never use water on a grease fire.
How often should I clean my vertical smoker to prevent flare-ups?
Perform light cleaning after every cook by scraping grates and emptying drip pans. Deep clean every 3-4 cooks or monthly during heavy use, removing all grease buildup from interior surfaces. Always clean before long-term storage.
Can I still get good smoke flavor if I use drip pans to prevent flare-ups?
Absolutely. Place drip pans only under the meat, not covering entire grates, and use perforated pans or elevate the meat slightly above the pan surface. Smoke still circulates around the food, and you can add wood chips to the pan for extra flavor.
What’s the safest vertical smoker type for beginners concerned about flare-ups?
Electric vertical smokers generally pose the lowest flare-up risk since they lack open flames and typically have enclosed heating elements. However, any type is safe when used with proper grease management and temperature control techniques.
How full should the water pan be for optimal flare-up prevention?
Fill the water pan within 1 inch of the rim at the start of your cook. Check every 2-3 hours and refill with hot water as needed. A full pan provides better heat shielding and maintains more stable temperatures.
Does cold weather increase flare-up risk in vertical smokers?
Yes, cold weather can increase flare-up risk because you may over-fuel the smoker to maintain temperature, creating excess heat that can ignite grease. Use insulation blankets and allow longer preheating times instead of adding extra fuel.
Can I use sand instead of water in the water pan to prevent flare-ups?
Sand works as thermal mass but doesn’t provide the evaporative cooling effect that helps suppress grease fires. A hybrid approach uses mostly sand covered with 1-2 inches of water on top, combining thermal stability with moisture and fire suppression.
What foods are most likely to cause flare-ups in vertical smokers?
Pork shoulder, brisket with thick fat caps, duck, bacon, and heavily marbled sausages produce the most grease. Trim external fat to 1/4 inch and consider wrapping these foods after several hours of cooking.
Are pellet vertical smokers completely safe from flare-ups?
No, pellet smokers can still experience flare-ups if the grease tray doesn’t completely cover the fire pot or if it becomes overfilled. Always ensure the tray is properly positioned and empty the grease bucket before each cook.
How can I tell if my smoker’s temperature gauge is accurate enough for safe operation?
Test gauge accuracy by placing a reliable digital probe next to it during a cook. If readings differ by more than 25°F, replace the factory gauge. Accurate temperature monitoring is essential for catching dangerous spikes before they become flare-ups.