Table of Contents
There’s something almost magical about the humble ugly drum smoker. It’s not about polished stainless steel or digital touchscreens; it’s raw, reliable, and remarkably effective barbecue engineering wrapped in a repurposed steel drum. For the DIY enthusiast who finds joy in the build as much as the bite, the drum smoker represents the perfect fusion of simplicity and smoky perfection. Forget chasing the latest gadget – this is where true barbecue soul lives, in the rhythmic dance of charcoal, airflow, and patience. It’s accessible, forgiving for beginners yet endlessly tweakable for masters, proving that sometimes the most beautiful results come from the simplest, most “ugly” foundations.
Building or choosing your own drum smoker isn’t just about saving money (though that’s a nice perk); it’s about claiming ownership of your smoke journey. You understand every weld, every air hole, and how each modification impacts the final flavor resting on your grate. In 2026, the core principles haven’t changed – efficient heat circulation, stable temperatures, and clean smoke remain king – but the knowledge and techniques available to the DIYer have never been richer. Whether you’re converting a 55-gallon drum in your garage or sourcing a pre-fabricated shell to make your own, this guide cuts through the noise to focus on what truly matters for building a drum smoker that delivers exceptional results, year after year. Let’s get down to the fundamentals that separate a functional smoker from a true game-changer.
Top 10 Ugly Drum Smokers
Detailed Product Reviews
1. Total Control 2 Inch Threaded UDS Smoke Stack w/Tear Drop Damper Parts for DIY Ugly Drum Smoker

Overview: This LavaLock-made smoke stack is a precision component designed specifically for DIY Ugly Drum Smokers (UDS), featuring a 2-inch threaded design that seamlessly integrates with standard 2-inch bungs on drum smokers. It includes a tear drop damper top for essential airflow control. What Makes It Stand Out: Its standout feature is the threaded installation, offering a significantly more secure and leak-proof fit compared to screw-on alternatives, reducing smoke escape. Being crafted by UDS specialists “LavaLock” and proudly made in the USA assures quality and design expertise tailored for drum smokers. Value for Money: While priced slightly higher than basic screw-on vents, the superior threaded connection justifies the cost by eliminating common fitting issues and enhancing long-term reliability, making it a cost-effective investment over cheaper, less secure options. Strengths and Weaknesses: Strengths include exceptional build quality, secure threaded installation, USA manufacturing, and precise damper function. Weaknesses are the potential need for a compatible bung (not always standard) and a higher price point than non-threaded competitors; the steel requires painting for maximum rust resistance. Bottom Line: Highly recommended for serious UDS builders prioritizing a professional, leak-free seal and supporting US manufacturing; essential if your drum already has a 2" bung.
2. MWEDP 2" Teardrop Flanged Vent for UDS Ugly Drum Smoker Lid Exhaust, BBQ smoker Vent Smoke Stack Damper - With Screws (aluminium)

Overview: This aluminum teardrop flanged vent damper provides an exhaust solution for UDS and other DIY smokers like wine barrel builds, featuring a lightweight, corrosion-resistant design with included screws for straightforward mounting. What Makes It Stand Out: The use of aluminum is key—it’s significantly lighter than steel, offers excellent heat conductivity for responsive temperature control, and is inherently corrosion-resistant without needing paint, while its smooth surface allows for easy DIY customization. Value for Money: Offers good value for those seeking a lightweight, maintenance-free (no painting) option. While aluminum dampers can be pricier than basic steel, the material benefits and included hardware present a solid deal, especially compared to painted steel alternatives requiring upkeep. Strengths and Weaknesses: Strengths are its light weight, natural corrosion resistance, non-toxic properties, smooth surface for customization, and included screws. Weaknesses include potentially less durability than thick steel under extreme impact and slightly lower heat retention than steel, which might affect temp stability in very windy conditions. Bottom Line: An excellent, low-maintenance choice for UDS and wine barrel smokers, particularly valued for its corrosion resistance and weight; ideal for builders wanting a ready-to-use, safe aluminum component.
3. 2" Teardrop Flanged Exhaust Vent Damper for UDS 16 30 55 Gallon Ugly Drum BBQ Smokers- with Screws

Overview: This versatile steel damper is engineered for universal fitment across common UDS sizes (16, 30, 55-gallon) and Masterbuilt digital charcoal smokers, featuring a 2" teardrop flange design aimed at optimizing smoke flow and temperature management. What Makes It Stand Out: Its broad compatibility with multiple drum sizes and popular commercial smokers (like Masterbuilt) sets it apart. The teardrop shape specifically enhances aerodynamic exhaust flow, promoting more consistent internal temperatures crucial for even cooking results. Value for Money: Represents strong value due to its wide applicability. The included screws and focus on rust-resistant steel construction provide reliable performance at a competitive price, outperforming single-size dampers in flexibility without a significant cost premium. Strengths and Weaknesses: Strengths include multi-size compatibility, effective teardrop airflow design, rust-resistant material, ease of screw installation, and improved temperature consistency. Weaknesses are the need for painting to prevent long-term rust and potential minor fit variations on non-standard lids; steel is heavier than aluminum. Bottom Line: A top recommendation for UDS builders needing one damper for various drum sizes or using a Masterbuilt converter, offering reliable performance and excellent versatility for the price.
4. 2" Teardrop Flanged Vent Damper,Compatible with UDS Ugly Drum Smoker Lid Exhaust,for UDS 55 Gallon Ugly Drum Smokers

Overview: This straightforward steel damper targets UDS builders, specifically highlighting compatibility with 55-gallon drums and Masterbuilt 40" digital charcoal smokers, emphasizing ease of installation and essential exhaust functionality. What Makes It Stand Out: It focuses on practical benefits: high-temperature and corrosion resistance for longevity, a design claimed to reduce wind resistance for better exhaust efficiency, and very simple screw-based installation, making it accessible for beginners. Value for Money: Positioned as a budget-friendly, no-frills option. Its value lies in core functionality and compatibility at a lower price point. While material specifics are vague (“high quality”), it delivers the essential damper function effectively for the cost, especially compared to premium threaded or aluminum models. Strengths and Weaknesses: Strengths are easy screw installation, affordability, compatibility with major UDS sizes and Masterbuilt, and claimed heat/corrosion resistance. Weaknesses include unspecified steel quality (likely thinner/basic), the necessity for painting to prevent rust, and less distinctive features compared to competitors with threaded fittings or aluminum construction. Bottom Line: A solid, economical choice for beginners or those needing a simple replacement, offering reliable basic performance; best suited if budget is the primary concern and painting for rust prevention isn’t an issue.
5. Heavy Duty Lid Hinge with Quick Release & Hardware Compatible with UDS 55 Gallon Ugly Drum Smokers (Black)

Overview: Moving beyond dampers, this heavy-duty steel hinge system solves a common UDS pain point: managing the heavy lid. Designed for 55-gallon drums, it features a quick-release mechanism and secure hardware to keep the lid attached yet easily movable. What Makes It Stand Out: The integrated quick-release lever is the key innovation, allowing instant lid removal without tools while the hinge remains fixed to the drum. This enhances safety, prevents lid loss, and provides precise control over lid positioning during cooking—unlike permanent hinges or detached lids. Value for Money: Excellent value for the functionality it provides. The convenience, safety improvement, and time saved over struggling with a heavy, detached lid justify the cost. It’s a significant upgrade from makeshift solutions and competitively priced against similar purpose-built hinges. Strengths and Weaknesses: Strengths include the game-changing quick-release feature, robust steel construction, secure locking stops, improved safety, and prevention of smoke escape when closed. Weaknesses may include potential long-term rust if not maintained (though heat-resistant), and the black finish might chip under heavy use. Bottom Line: An essential, highly recommended upgrade for any 55-gallon UDS owner; the quick-release hinge dramatically improves usability, safety, and cooking control, making it worth every penny.
6. UDS air inlet Long Tube Intake pipe valve BBQ Ugly Drum Smoker DIY parts set (2)
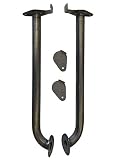
Overview:
This basic set provides essential air inlet components for DIY Ugly Drum Smoker (UDS) builders, including long tube intake pipes and valves designed to regulate airflow into a 55-gallon drum smoker.
What Makes It Stand Out:
Its simplicity and focus on core functionality stand out. The long tube design allows precise placement of the air intake below the firebox, promoting optimal oxygen flow for consistent combustion and temperature control—critical for low-and-slow smoking. The inclusion of valves enables fine-tuned airflow adjustments.
Value for Money:
Priced affordably as a niche DIY part, it offers solid value for beginners constructing their first UDS. While generic alternatives exist, this dedicated set ensures compatibility and saves time sourcing individual components, making it a cost-effective starting point.
Strengths and Weaknesses:
Strengths: Essential for proper UDS airflow management; simple installation; durable metal construction (inferred). Weaknesses: Lacks detailed specs or material info; no gaskets or mounting hardware included; basic design offers no advanced features like integrated thermometers.
Bottom Line:
A functional, no-frills solution for DIY UDS builds. Ideal for budget-conscious beginners needing core airflow parts, but experienced builders may prefer upgraded kits with added precision.
7. Chamixx Heavy Duty Lid Hinge with Quick Release and Hardware Compatible with UDS 55 Gallon Ugly Drum Smokers

Overview:
This hinge system secures the lid to a 55-gallon UDS drum, featuring a quick-release mechanism and full hardware kit for reliable, heat-resistant operation during smoking sessions.
What Makes It Stand Out:
The quick-release function is a game-changer, allowing effortless lid removal without full disassembly. Constructed from high-strength steel, it maintains a tight seal to prevent heat/smoke loss—a critical upgrade over flimsy DIY hinges—and includes all necessary bolts/nuts for tool-free installation.
Value for Money:
Priced competitively against generic hinges, its durability and convenience justify the cost. The included hardware and heat-resistant steel eliminate the need for costly replacements, offering better long-term value than cheaper alternatives that warp or fail.
Strengths and Weaknesses:
Strengths: Quick-release mechanism saves time; robust steel withstands high heat; complete hardware kit; ensures consistent smoke retention. Weaknesses: Limited adjustability for uneven lids; steel may require occasional anti-rust treatment; no insulation for handle comfort.
Bottom Line:
A must-have upgrade for UDS builders seeking convenience and reliability. The quick-release feature and solid construction make it worth every penny for frequent smokers.
8. Big Poppa’s DIY Drum Smoker Kit - Convert a 55 Gallon Drum into a Premium BBQ Grill - Unleash Your Inner Pitmaster & Craft Your Customize BBQ Setting with our Smoker Accessories

Overview:
This comprehensive kit transforms a standard 55-gallon drum into a fully functional UDS, featuring stainless-steel hardware, grates, gaskets, and customization-focused components for tailored smoking experiences.
What Makes It Stand Out:
Its emphasis on bespoke customization sets it apart. Beyond basic assembly, it enables precise temp control systems, multi-rack setups, and modular configurations. The premium stainless-steel hardware and high-temp gaskets ensure durability, while clear instructions cater to all skill levels.
Value for Money:
Though pricier than bare-bones kits, it delivers exceptional value by including every critical component (grates, gaskets, hardware) needed for a professional-grade UDS. The time saved on sourcing parts and reduced trial/error outweighs the cost versus piecemeal alternatives.
Strengths and Weaknesses:
Strengths: Complete, high-quality components; beginner-friendly instructions; supports extensive customization; excellent heat retention/smoke flow. Weaknesses: Requires sourcing your own drum; advanced customizations (e.g., temp systems) need additional purchases; stainless steel may show heat discoloration.
Bottom Line:
The best-in-class kit for serious DIYers. Justifies its price with premium materials, versatility, and flawless performance—highly recommended for pitmasters craving a personalized smoker.
9. LavaLock® UDS 55 Gallon charcoal firebox basket for Ugly Drum Smoker WITH legs and ash pan
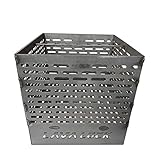
Overview:
This heavy-duty firebox basket, complete with legs and an ash pan, is engineered specifically for 55-gallon UDS builds to elevate charcoal off the drum floor and simplify ash management.
What Makes It Stand Out:
The integrated legs and ash pan are standout features, enabling optimal airflow beneath the coals while containing ash for easy cleanup. Its “X-large” 12" cube size maximizes fuel capacity, and the “Super Heavy Duty” USA-made steel ensures longevity under extreme heat.
Value for Money:
Priced at a premium, it’s justified by the Made-in-USA craftsmanship and all-in-one design (basket + legs + pan). Cheaper baskets often lack ash pans or require welding legs—a costly hassle this avoids, making it a smart investment for frequent use.
Strengths and Weaknesses:
Strengths: Simplifies ash disposal; promotes consistent heat; robust construction; flat lift handle aids safety. Weaknesses: Premium cost may deter casual users; dimensions may not fit modified drums; no included charcoal grate for layering.
Bottom Line:
A top-tier upgrade for UDS efficiency and cleanliness. Worth the splurge for dedicated smokers prioritizing performance and ease of maintenance.
10. UDS Ugly Drum Lid Exhaust 2" Teardrop Flanged Vent Damper Smoke Stack Smoker Builder Part

Overview:
This USA-made exhaust vent damper mounts to UDS lids, featuring a 2" teardrop-shaped flange for precise smokestack control and optimal airflow management in 55-gallon drum smokers.
What Makes It Stand Out:
Laser-cut precision ensures a perfect seal and smooth damper operation, critical for maintaining steady temps. The heavy-duty steel construction resists warping, while the simple bolt-on design eliminates complex welding—ideal for DIYers seeking pro results.
Value for Money:
Competitively priced for its quality, it outperforms cheap stamped vents that seize or leak. The durability and precision justify the cost, as replacements for inferior vents often exceed this unit’s price over time.
Strengths and Weaknesses:
Strengths: Laser-cut accuracy; easy bolt-on install; USA-made durability; fine-tuned airflow control; expert-backed design. Weaknesses: Limited to 2" stacks; no thermal coating (may rust); basic aesthetics.
Bottom Line:
An essential, reliable exhaust solution for UDS builds. Delivers pro-level control without complexity—highly recommended for consistent smoking results.
Understanding the Ugly Drum Smoker Advantage
The ugly drum smoker’s enduring popularity isn’t accidental. Its cylindrical shape creates a natural convection current, pulling smoke and heat upwards in a consistent column around the food. This design minimizes hot and cold spots, a common frustration in many offset smokers. Unlike complex rigs requiring constant babysitting, a well-tuned drum smoker excels at steady, low-and-slow cooking with minimal intervention once the initial fire is established. The thick steel walls provide excellent thermal mass, absorbing and radiating heat evenly, which is crucial for battling wind or minor temperature fluctuations. For the DIYer, the beauty lies in the forgiving nature of the design; minor imperfections in your build are less likely to ruin a cook compared to more temperamental setups.
Why Simplicity Wins for Consistent Results
The drum smoker’s minimalist approach – essentially a fire chamber below the cooking grate with controlled airflow – eliminates many variables that plague beginners. There’s no firebox to manage separately, no complicated baffles to install incorrectly. This simplicity translates directly to more predictable outcomes. You learn the core relationship between fuel, oxygen, and temperature faster. Fewer moving parts also mean less that can go wrong during a critical cook, reducing stress and increasing confidence. Mastering this fundamental design provides invaluable knowledge that applies to any smoker you might use later.
The Unbeatable Value Proposition for DIYers
Starting with a basic drum (often sourced cheaply or even free) and essential hardware puts a capable, high-performance smoker within reach of almost any budget. The cost to build a highly effective unit is a fraction of commercial alternatives, freeing up funds for quality fuel, meat, or accessories. This low barrier to entry democratizes serious barbecue, allowing experimentation without significant financial risk. The satisfaction derived from eating ribs smoked in something you built yourself? That’s a flavor enhancer no store can sell.
Core Construction Principles for Peak Performance
The foundation of any successful drum smoker build is the drum itself. While 55-gallon drums are the standard, ensuring it’s food-grade and thoroughly cleaned is non-negotiable. Residues from previous contents can impart terrible flavors or even be hazardous. Avoid drums that held chemicals, solvents, or toxic substances. Look for drums specifically marked as safe for food or pharmaceutical use. The steel thickness matters too; standard drum steel (around 16-18 gauge) is generally sufficient, but thicker steel offers better heat retention. Inspect for rust – minor surface rust can be treated, but deep pitting compromises structural integrity and heat distribution.
Essential Steel Preparation Steps
Properly preparing the drum is where many DIY projects stumble. Simply rinsing isn’t enough. A rigorous cleaning process involving hot water, heavy-duty degreasers, and potentially a solvent like acetone is crucial to remove all traces of previous contents. Sandblasting the interior is highly recommended to eliminate stubborn residues and create a surface that won’t contaminate your smoke. Never skip this step – your barbecue’s flavor depends on it. After cleaning, a light coat of high-heat resistant paint (like stove paint) on the exterior can protect against rust, but avoid painting the interior where smoke and heat contact directly.
Strategic Placement of Critical Components
The location of your air inlets and chimney outlet dictates airflow efficiency. Air inlets (typically near the bottom) should be positioned opposite the cooking chamber door to encourage cross-flow before the air rises. The chimney exhaust, placed directly above the cooking grate area, must be tall enough (usually 12-18 inches above the drum) to create a strong draft. Placing the cooking grate too high or too low relative to the fire basket drastically affects heat distribution and cooking times. Standard practice places the grate 12-18 inches above the top of the fire basket for optimal low-and-slow performance.
Mastering Airflow: The Heartbeat of Your Drum
Airflow isn’t just important; it’s the single most critical factor controlling your drum smoker’s temperature and smoke quality. Think of your smoker as a chimney: cool air enters low, gets heated by the fire, rises, and exits through the top, pulling in more fresh air as it goes. Restricting the intake air slows this cycle, lowering temperature; opening it speeds things up, raising heat. The size, placement, and adjustability of your intake dampers and chimney cap are paramount. Fixed holes rarely offer the precise control needed across different weather conditions and cook types.
Designing Effective Intake Dampers
Your intake dampers need fine control. Simple fixed holes work poorly. Hinged plates, sliding dampers, or even carefully drilled and tapped holes with adjustable butterfly valves offer the granularity required. Aim for multiple small intake points (e.g., 3-4 holes around the bottom circumference) rather than one large hole. This promotes even air distribution across the fire base. The total open area of your intakes should be roughly 1.5 to 2 times the cross-sectional area of your chimney pipe for good draft without excessive oxygen feeding the fire uncontrollably.
Optimizing the Exhaust System for Stability
The exhaust isn’t just an exit; it’s the engine driver. A chimney that’s too short creates weak draft, leading to smoky, inconsistent temperatures. Too long can create excessive draft, making temperature control difficult and burning fuel too fast. A removable or adjustable chimney cap (like a daisy wheel damper) is invaluable for fine-tuning exhaust flow, especially in windy conditions where you need to shield the top without killing the draft entirely. Ensure the chimney pipe is straight and unobstructed for maximum efficiency.
Temperature Control: Beyond Guesswork
Relying solely on eyeballing the fire or feeling the drum exterior is a recipe for inconsistency. Accurate temperature monitoring at multiple points is essential. You need a reliable thermometer in the cooking chamber, ideally placed near where your meat will sit (often just below the grate). A second thermometer near the top of the chamber helps monitor the smoke stack effect. Probe thermometers for your meat are, of course, mandatory. Digital thermometers with remote probes and alerts take the guesswork out, allowing you to manage the cook without constantly opening the lid.
The Critical Role of Fire Management
How you manage your charcoal and wood chunks directly impacts temperature stability. Using a dedicated fire basket (usually a smaller can or mesh basket placed centrally) concentrates the heat source and makes adding fuel easier without disturbing the cooking environment. Lump charcoal is generally preferred over briquettes for its cleaner burn and better temperature response. Adding wood chunks early in the fire build allows them to ignite properly and produce clean smoke; adding them directly to hot coals later can cause flare-ups or bitter smoke. Learning the “set and forget” rhythm for adding small amounts of fuel is key to long cooks.
Taming the Stall and Environmental Factors
Every low-and-slow cook encounters the “stall” – when evaporative cooling from the meat’s surface halts temperature rise. Understanding this is normal prevents panic and unnecessary fuel additions. Wind is the enemy of stable temps; position your smoker to block prevailing winds or use a windbreak (safely distanced). Cold ambient temperatures require more fuel and potentially insulating the drum (cautiously – never with flammable materials touching hot steel). Humidity affects burn rates subtly. Tracking these variables in a log helps you anticipate adjustments.
Cooking Chamber Design for Versatility
The cooking grate setup defines your usable space and flexibility. Most builds use a single main grate, but adding a second, adjustable grate level significantly increases versatility. This allows you to cook different items at different effective temperatures (hotter closer to the fire, cooler further away) or accommodate larger cuts. Grates should be made of sturdy, high-heat tolerant material like stainless steel or seasoned cast iron. Ensure they are easily removable for cleaning and fire access. Consider the clearance between the grate and the drum lid; you need enough room for tall items like whole chickens or roasts without the lid pressing down.
Maximizing Usable Space Efficiently
Donut-style fire baskets (a ring around the perimeter) free up the center of the cooking chamber, allowing you to place large items directly over the heat zone if needed. Alternatively, a centered basket creates a more traditional “ring of heat” around the perimeter, ideal for ribs or multiple smaller items. Think about the types of meat you cook most often. Do you need space for four racks of ribs? A large turkey? Design your grate height and basket placement accordingly. Removable center posts for supporting multiple grates add stability for heavy loads.
Door Design: Function Over Form
The cooking chamber door needs to seal reasonably well to maintain temperature and smoke, but perfect airtightness isn’t necessary (and can be dangerous due to pressure buildup). Hinges should be robust enough to handle the weight of a potentially hot, meat-laden door. A simple latch is sufficient. Some builders incorporate a small viewing window (using high-heat glass like Pyroceram), but this is optional and adds complexity. The key is ease of opening/closing without losing significant heat or requiring excessive force.
Fuel and Smoke Management Secrets
The type of charcoal you use impacts burn time, temperature stability, and ash production. Hardwood lump charcoal burns cleaner, hotter, and responds faster to airflow changes than briquettes, which often contain fillers. While more expensive, lump is generally favored by serious drum smoker users for its performance. If using briquettes, opt for high-quality, additive-free brands. Consistency in your fuel source matters – switching brands can noticeably alter burn characteristics. Store charcoal in a dry, airtight container to prevent moisture absorption, which ruins performance.
Wood Selection and Integration Techniques
Wood choice defines your smoke flavor profile. Hardwoods like hickory, oak, apple, and pecan are classics. Avoid softwoods (pine, cedar) as they contain sap that creates bitter, unpleasant smoke. The key is clean, thin blue smoke, not thick white billows. This is achieved by ensuring your wood chunks or chunks are ignited properly by the charcoal base, not smoldering from lack of oxygen. Adding wood too early (when the fire is still lighting) or too late (when coals are nearly ashed over) produces bad smoke. Small amounts added periodically are better than one large chunk.
Avoiding the Bitter Smoke Trap
Bitter smoke is the arch-nemesis of good barbecue, often stemming from smoldering wood due to insufficient oxygen. This commonly happens if wood is added directly to unlit charcoal, placed in a pit with poor airflow, or if the fire is choked down too severely. Ensure your intake dampers are open enough to support clean combustion before adding wood. If you see thick white smoke pouring out, close the dampers slightly to increase heat and burn off the creosote, or temporarily open them wider to increase oxygen flow to the fire. Patience is key – wait for the smoke to turn thin and blue.
Insulation: When and How to Use It
Adding insulation to your drum smoker is a common modification, but it’s not always necessary and must be done safely. The primary benefit is improved heat retention in very cold or windy conditions, leading to more stable temperatures and reduced fuel consumption. However, improper insulation can be a major fire hazard. Never use flammable materials like standard foam, cardboard, or fiberglass batting directly against the hot drum. Safe options include specialized high-temperature ceramic fiber blankets (rated well above 1000°F) wrapped securely and completely covered with another layer of metal (like sheet steel or aluminum flashing) to prevent contact with anything flammable and protect the insulation from weather.
Evaluating the Need for Insulation
For most moderate climates and standard cooks, the drum’s inherent thermal mass is sufficient. Insulation becomes more beneficial for extended cooks (12+ hours) in sub-40°F weather, or if you struggle to maintain temps on extremely windy days. It’s generally overkill for shorter cooks or in warm weather. Consider starting without insulation; if you consistently face challenges in harsh conditions, then explore safe insulation methods. The potential fire risk outweighs the benefits for casual users in average conditions.
Safe Installation Practices
If insulating, ensure the insulation blanket is cut precisely to fit snugly against the drum without gaps. Secure it with high-temperature wire or stainless steel bands, not duct tape or zip ties that will melt. The critical outer metal jacket must completely encase the insulation, providing a smooth, non-flammable surface. Leave ample clearance (several inches) between the insulated drum and any structures, walls, or flammable surfaces. Double and triple-check that no part of the insulation can ever come into contact with direct flame or embers.
Essential Accessories for the Savvy Builder
While the drum smoker core is beautifully simple, a few well-chosen accessories significantly enhance usability and results. A sturdy, level base is non-negotiable – wobbling leads to spilled ash and potential hazards. Cinder blocks, a welded steel frame, or even heavy-duty wooden pallets (kept well clear of heat) work. Ash management is crucial; a dedicated ash pan that slides easily under the fire basket or a removable bottom grate simplifies cleanup immensely. Never let ash build up excessively, as it insulates the fire and chokes airflow from below.
Must-Have Tools for Operation
Beyond thermometers, a few tools make life easier: long, heavy-duty gloves for handling hot components; a sturdy ash shovel and metal bucket for disposal; aluminum foil for wrapping meat (the stall) or creating custom drip pans; and high-quality firestarters (avoid lighter fluid near food). A simple hook or rack inside the drum to hold water pans keeps them stable. Consider a dedicated, heat-resistant surface near the smoker for plating meat and tools – never use plastic near the heat source.
Upgrades Worth Considering
Once the basics are mastered, thoughtful upgrades can refine your experience. A custom-made, well-sealing lid with a gasket reduces heat loss. A secondary “warm” shelf above the main cooking grate utilizes residual heat for keeping sides warm. A dedicated, insulated fire starter chimney ensures you always have a perfect bed of coals without contaminating your main drum. A high-quality, adjustable charcoal basket (like a wire mesh cylinder) improves fuel efficiency over a simple can. Focus on upgrades that solve specific problems you encounter, not just for the sake of adding complexity.
Safety: The Non-Negotiable Foundation
Working with fire, high heat, and heavy steel demands constant vigilance. Your drum smoker must be placed on a completely non-combustible surface, far away (at least 10-15 feet) from any structures, decks, overhanging branches, or dry vegetation. Never operate it indoors or in a garage, even with the door open – deadly carbon monoxide buildup is a real risk. Keep a dedicated, large ABC fire extinguisher rated for grease and electrical fires within immediate reach at all times. Have a bucket of sand or dirt nearby as a secondary fire suppression method. Water can sometimes spread a grease fire.
Safe Handling Practices During Use
Always assume any part of the smoker is hot. Use appropriate high-heat gloves (not oven mitts) when touching the drum, lid, or grates. Lift the lid slowly and away from you to avoid a rush of hot smoke/steam. Open the cooking chamber door carefully for the same reason. Never leave the smoker unattended for long periods, especially during the initial fire build or if temperatures are running unusually high. Have a clear plan for ash disposal: let ashes cool completely in a metal container (never plastic or wood) for at least 48 hours before disposal, and keep the container away from combustibles.
Maintenance for Long-Term Safety
Regular cleaning prevents dangerous ash buildup and reduces fire risk. After each cook, while the drum is still warm (but not scalding hot), remove ash and large debris. Perform a deeper clean periodically, scraping the interior walls to remove excessive creosote buildup, which is flammable. Inspect hinges, latches, and structural welds (if welded) for signs of weakness or rust. Replace any damaged components immediately. Never ignore unusual smells, excessive smoke from seams, or difficulty controlling temperature – these can be early signs of problems.
Building vs. Buying a Shell: Making the Right Choice
The DIY spirit often starts with a full build from a raw drum, and the satisfaction is immense. However, sourcing a properly cleaned, food-grade drum can be challenging, and cutting/fitting requires basic metalworking skills (angle grinder, drill) and safety gear. Welding the door, attaching legs, and installing dampers adds complexity. If your skills or tools are limited, purchasing a pre-cut drum smoker shell from a reputable maker can be a smart starting point. These provide the critical, safety-critical components (clean drum, properly cut door, welded legs, installed dampers) ready for you to add grates and personalize.
Assessing Your Skill Level Honestly
Be realistic about your comfort with power tools and metalwork. Cutting a drum lid cleanly requires patience and the right tools. Welding thin steel without burning holes takes practice. If you’re unsure, starting with a shell avoids frustration and potential safety hazards from a poorly constructed unit. Many excellent shells come with detailed assembly instructions, allowing you to focus on the cooking aspects first. You can always add custom features later as your confidence grows. Don’t let the desire for a full build lead to a dangerous or unusable smoker.
The Value of Community Knowledge
Whichever path you choose, tap into the vast online community of drum smoker enthusiasts. Forums, social media groups, and dedicated websites are treasure troves of build tips, troubleshooting advice, and inspiration. Seeing how others solved common problems (like door seals or ash management) is invaluable. Don’t hesitate to ask questions – most veterans are eager to help newcomers avoid the mistakes they made. This shared knowledge accelerates your learning curve far beyond what any single article can provide.
Long-Term Care for Peak Performance
A drum smoker is a tool that rewards good care. After every cook, once cooled, give it a basic wipe-down of the exterior to remove grease splatter. The interior needs more attention: remove ash completely, and scrape off heavy creosote buildup with a wire brush when cool. Avoid harsh chemical cleaners inside the cooking chamber; a stiff brush and warm water are usually sufficient. For stubborn residue, a paste of baking soda and water can help, followed by thorough rinsing and drying. Never leave the drum exposed to constant rain; store it covered or in a dry area when not in use for extended periods.
Preventing and Addressing Rust
Rust is the natural enemy. Minor surface rust on the exterior can be treated by sanding it down to bare metal and applying high-heat paint (stove paint). For the interior, prevention is key through regular cleaning and drying after use. If interior rust appears, scrub it off thoroughly with a wire brush (wear a mask!), then heat the drum to a high temperature to burn off any residue and dry it completely. Avoid painting the interior. Regular use actually helps protect the interior through seasoning – layers of carbonized smoke create a natural, protective coating over time.
Knowing When to Refresh or Replace
With proper care, a drum smoker can last decades. However, significant rust penetration, especially near welds or stress points (like door hinges), compromises structural integrity and safety. Deep pitting on the interior where food cooks can harbor bacteria and affect flavor. If the drum becomes significantly warped from heat stress, temperature control becomes difficult. Don’t try to patch a drum that’s failing structurally; it’s not worth the risk. Thankfully, replacing the core drum component is relatively inexpensive compared to the whole setup.
Frequently Asked Questions
Frequently Asked Questions
How much does it realistically cost to build a functional drum smoker? Expect to spend between $100-$300 for materials if sourcing your own drum and basic hardware. This covers the drum (often free or cheap if food-grade), fire basket, grates, dampers, legs/base, and thermometers. Pre-cut shells typically start around $250-$400, not including grates or extras.
Can I use any 55-gallon drum I find? Absolutely not. Only use drums explicitly marked as safe for food or pharmaceuticals. Drums that held chemicals, oils, or unknown substances can leach toxins into your food and create dangerous fumes. Thorough cleaning is mandatory, but starting with a known-safe drum is critical.
Why does my drum smoker produce thick, white smoke that tastes bitter? This almost always means your wood is smoldering due to insufficient oxygen. Ensure your intake dampers are open enough to support clean combustion before adding wood chunks. Close dampers slightly to increase heat and burn off creosote, or open them wider temporarily to increase airflow to the fire. Wait for thin, blue smoke.
Is insulation necessary for a drum smoker? Generally, no. The drum’s steel provides good thermal mass for most conditions. Insulation is primarily beneficial for very long cooks (12+ hours) in extremely cold (<40°F) or windy weather to improve stability and save fuel. It adds complexity and fire risk if done improperly.
How do I prevent the dreaded temperature stall during long cooks? The stall (when meat temp plateaus) is natural evaporative cooling. Don’t panic and crank the heat! Maintain your target temp (usually 225-250°F) and be patient. Wrapping the meat tightly in foil or butcher paper (“the Texas crutch”) after several hours can power through the stall faster if desired.
What’s the best way to manage ashes during a long cook? Use a removable ash pan that slides under the fire basket or a bottom grate designed for easy ash removal. Never let ash build up more than 1-2 inches, as it insulates the fire and chokes airflow. Remove ash carefully while the fire is low using long-handled tools and a metal container.
Can I safely modify a drum smoker I bought used? Yes, but inspect it thoroughly first. Check for structural integrity, rust, and ensure it was previously used for safe contents. Clean it meticulously. Modifications like adding better dampers or a new grate are common, but avoid compromising structural safety or adding unsafe insulation.
How high should I set my cooking grate above the fire? The standard and most versatile height is 12-18 inches above the top of your fire basket. This provides optimal radiant heat for low-and-slow cooking. You can add a second, higher grate for “warmer” cooking if needed, but the primary grate should be in this range.
Why does my temperature fluctuate wildly, especially on windy days? Wind disrupts the natural draft. Reposition the smoker to block the wind, or use a non-flammable windbreak (like cinder blocks) placed safely away from the drum. Ensure your dampers are adjustable for fine control – a fixed intake hole offers little ability to counteract wind effects.
Is lump charcoal really better than briquettes for drum smokers? Yes, for most enthusiasts. Lump charcoal burns cleaner (less ash), responds faster to airflow changes for precise temp control, and generally produces better flavor. While more expensive, its performance advantages in a drum smoker’s simple firebox are significant. Use high-quality, additive-free briquettes only if lump isn’t feasible.
See Also
- 10 Game-Changing Offset Drum Smokers for Serious BBQ Lovers in 2026
- 10 Game-Changing Ugly Drum Smokers for Budget-Friendly Smoking in 2026
- 10 Game-Changing Smoker Covers for Serious BBQ Enthusiasts in 2026
- 10 Game-Changing Offset Smoker Carts for Serious BBQ Enthusiasts in 2026
- 10 Game-Changing Offset Smokers for Competitive BBQ Teams in 2026