Table of Contents
There’s something deeply satisfying about crafting the perfect burger at home—that moment when you bite into a patty that’s cooked evenly, holds together beautifully, and fits your bun just right. For beginners stepping into the world of homemade burgers, a budget-friendly press under $30 can transform your grilling game without draining your wallet. These simple tools eliminate the guesswork, delivering consistent patties that cook uniformly and look professionally made, whether you’re firing up the backyard grill or cooking on your stovetop.
Navigating the sea of affordable burger presses might seem overwhelming at first, but understanding what features matter most will help you make a smart investment. The best budget options in 2026 combine durability, ease of use, and versatility while keeping costs low. This guide walks you through everything you need to know about selecting the ideal press for your needs, from material considerations to maintenance tips, ensuring your first foray into pressed burgers is a resounding success.
Top 10 Burger Presses for Beginners
Detailed Product Reviews
1. Pisol Smash Burger Press, Hamburger Smasher Tool for Griddle, Stainless Steel Ham Patty Press with Anti-Scald Handle, 5.5" Non Stick Grill Press for Smashburger, Bacon, Ground Beef, Meat, Sausage

Overview: The Pisol Smash Burger Press delivers a compact 5.5-inch pressing surface crafted from 2.5mm thick food-grade 304 stainless steel. Featuring a dual-layer anti-scald handle with silicone insulation, this tool prioritizes user safety while creating perfectly smashed patties. The polished, non-stick surface prevents meat from sticking and ensures easy release, making it ideal for smash burgers, bacon, and sausage on any griddle or grill.
What Makes It Stand Out: The upgraded silicone-covered handle sets this press apart, offering superior heat protection compared to bare metal alternatives. Its dishwasher-safe stainless steel construction eliminates the maintenance hassle of cast iron seasoning. The 5.5-inch diameter provides excellent maneuverability on standard griddles while remaining compact enough for easy storage in crowded kitchen drawers, making it particularly suitable for indoor cooking environments.
Value for Money: Priced competitively for stainless steel models, this press offers excellent value for those prioritizing convenience over heft. While lighter than cast iron presses, it requires less storage space and zero maintenance. The included safety features justify a slight premium over bare-bones metal presses, making it a smart choice for casual home cooks who value ease of use and cleaning.
Strengths and Weaknesses: Pros: Superior heat-resistant handle prevents burns; dishwasher safe for effortless cleaning; rust-proof and stain-resistant; compact storage footprint; smooth non-stick surface. Cons: Lighter weight (2.5mm steel) requires more manual pressure for optimal crust; smaller 5.5" diameter limits patty size; stainless steel doesn’t retain heat as effectively as cast iron for searing; may need multiple presses for larger burgers.
Bottom Line: The Pisol press excels for safety-conscious cooks seeking low-maintenance performance. While it won’t match cast iron’s crust-producing power, its user-friendly design makes it the best choice for beginners and indoor kitchen use where convenience trumps extreme searing capability.
2. Smash Burger Press 6.5”, Cast Iron Flat Round Edge Grill/Bacon/Meat/Hamburger/Chef Press with Wood Handle, 1.74lb Burger Press Patty Maker for Griddles & Pans, Nonstick Hamburger Smasher Tool for BBQ

Overview: This heavyweight 6.5-inch cast iron press tips the scales at 1.74 pounds, delivering serious smashing power for restaurant-quality burgers. Pre-seasoned with natural vegetable oil, it arrives ready to create crispy, caramelized crusts. The heat-resistant wooden handle stays cool during cooking, while the flat bottom ensures maximum surface contact for even searing on griddles, skillets, or outdoor grills, making it ideal for both novice and experienced cooks.
What Makes It Stand Out: The substantial heft does the work for you, pressing out excess grease while forming perfect crusts without excessive manual force. Unlike chemical non-stick coatings, the fluorine-free cast iron develops a natural patina over time. Its 6.5-inch diameter accommodates larger patties and covers more cooking surface, making it versatile for bacon, steaks, and sandwiches while maintaining consistent results across different foods.
Value for Money: This press offers exceptional value for burger purists. The cast iron construction matches professional kitchen tools at a fraction of restaurant supply prices. While requiring occasional re-seasoning, its durability and multi-functionality as a steak weight and bacon press eliminate the need for separate tools, saving money long-term. The pre-seasoned surface means immediate use without initial preparation.
Strengths and Weaknesses: Pros: Heavyweight design creates superior crusts; excellent heat retention and distribution; pre-seasoned non-stick surface; large 6.5" diameter; stays hot between presses for batch cooking. Cons: Requires hand washing and periodic seasoning maintenance; heavier to maneuver; wooden handle may loosen with frequent use; can rust if not dried properly; not dishwasher safe.
Bottom Line: For grill enthusiasts seeking authentic smash burger crusts, this cast iron press is unmatched. The maintenance is a small price to pay for professional results that lighter presses simply cannot replicate. It’s the top choice for serious home chefs who prioritize performance over convenience.
3. Yunzt Burger Press 100 Patty Papers Set,4.6 Inch Round Smasher,Non-Stick Hamburger Patty Maker with Wax Paper,Aluminum Burger Maker for Kitchen BBQ Meat Beef Cheese Veggie Burger Maker
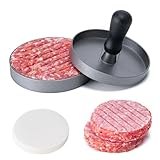
Overview: The Yunzt set combines a 4.6-inch aluminum press with 100 patty papers in an elegant package. Its detachable plastic handle enables compact storage and portability for camping or picnics. The press features an indentation design for consistent patty thickness and even cooking. Made from food-grade aluminum with a smooth, non-stick surface, it’s dishwasher safe and lightweight for easy handling by cooks of all skill levels.
What Makes It Stand Out: This is the only press that includes patty papers and prioritizes portability. The detachable handle design is genuinely innovative for space-constrained kitchens and outdoor adventures. The indentation pattern helps create uniform patties that cook evenly, addressing a common issue with hand-formed burgers and ensuring consistent results whether making beef, turkey, or veggie patties.
Value for Money: Excellent value for starter kits, essentially bundling accessories you’d purchase separately. The aluminum construction keeps costs down while remaining functional. However, the smaller diameter limits patty size, and the lighter weight requires more user effort. It’s priced appropriately for occasional users rather than daily burger enthusiasts who need heavy-duty performance.
Strengths and Weaknesses: Pros: Includes 100 patty papers; detachable handle for compact storage; dishwasher safe; lightweight and portable; indentation design ensures even cooking; affordable entry point. Cons: Small 4.6" diameter restricts patty size; aluminum lacks cast iron’s heat retention; plastic handle may degrade over high heat; indentation pattern may interfere with true smash burger technique; requires more manual pressure.
Bottom Line: Perfect for casual cooks, campers, and those with limited storage. While it won’t satisfy purists seeking maximum crust development, its portability and included accessories make it an unbeatable travel companion for occasional burger sessions and outdoor cooking adventures.
4. Cuisinart 6.5" Cast Iron Smashed Burger Press, Round Flat Edge Grill Press for Crispy Smash Burgers, Burger Tool for Grill and Griddle Accessories, for BBQs and Tailgates

Overview: Cuisinart’s 6.5-inch cast iron press brings brand reliability to smash burger making. The heavy-duty construction provides even pressure for consistent crust formation, while the flat edge design maximizes surface contact with patties. Built for both indoor griddles and outdoor grills, this press excels at creating the caramelized crust that defines authentic smash burgers, bacon, and grilled sandwiches at tailgates and backyard BBQs.
What Makes It Stand Out: The Cuisinart name ensures quality control and customer support that generic brands lack. Its straightforward, no-frills design focuses on core functionality without unnecessary features. The 6.5-inch diameter covers standard griddles completely, and the robust cast iron maintains temperature between presses for efficient batch cooking, making it practical for feeding groups.
Value for Money: Priced at a slight premium over unbranded alternatives, you’re paying for Cuisinart’s reputation and warranty support. The performance is identical to generic cast iron presses, but the brand backing provides peace of mind. For budget-conscious buyers, similar options exist for less, though the quality assurance justifies the cost for many consumers who value manufacturer support.
Strengths and Weaknesses: Pros: Trusted brand name and warranty; heavyweight cast iron for superior crusts; large cooking surface; excellent heat retention; simple, durable design; versatile for multiple foods. Cons: Requires hand washing and seasoning maintenance; heavier than stainless steel options; handle can get warm during extended use; no included accessories or special features; premium pricing.
Bottom Line: A solid, dependable choice for brand-loyal consumers. While it doesn’t innovate beyond basic cast iron design, Cuisinart’s reliability makes it a worry-free investment for anyone seeking consistent, professional smash burger results without gambling on unknown manufacturers.
5. Cuisinart 6" Stainless Steel Smashed Burger Press, Juicy and Crispy Burgers for BBQs, Cookouts

Overview: Cuisinart’s 6-inch stainless steel press offers a maintenance-free alternative to cast iron with the brand’s signature quality. The flat-edge design creates consistent, crispy patties while the durable stainless steel construction resists rust and corrosion. Suitable for griddles, skillets, and grills, this press targets home cooks who want smash burger capability without the seasoning rituals cast iron demands for cookouts and casual BBQs.
What Makes It Stand Out: The stainless steel construction eliminates rust concerns and simplifies cleanup compared to cast iron. Cuisinart’s engineering ensures even pressure distribution across the 6-inch surface, creating uniform crusts. Its moderate size bridges the gap between compact and large presses, offering versatility for various patty sizes while remaining easy to store in kitchen drawers or grill toolboxes.
Value for Money: Positioned at a premium for stainless steel models, the Cuisinart badge adds cost over generic alternatives. However, the build quality and warranty support justify the price for brand-conscious buyers. It costs less than heavy cast iron options while delivering easier maintenance, though sacrificing some crust-developing power that serious enthusiasts crave.
Strengths and Weaknesses: Pros: Rust-proof and low-maintenance; trusted Cuisinart quality; 6-inch versatile size; smooth surface prevents sticking; lightweight and easy to maneuver; dishwasher safe potential. Cons: Lighter weight requires more manual pressure; doesn’t retain heat like cast iron; hand-wash recommended despite stainless steel; handle lacks advanced heat shielding; no included accessories; premium brand pricing.
Bottom Line: An excellent compromise between performance and convenience. Ideal for occasional burger makers who value easy cleanup and brand reliability over the extreme crust capabilities of heavy cast iron alternatives. It’s the perfect middle-ground press for most home cooks.
6. EWFEN Burger Press, 7" Round Heavy-Duty Cast Iron Smash Bacon Press Meat Steak with Wood Handle for Griddle, Sandwich, Nonstick Pan

Overview: The EWFEN 7-inch cast iron grill press delivers serious heft for your griddle cooking needs. Weighing in with substantial food-grade cast iron construction, this press features a grooved bottom designed to create professional grill marks while preventing bacon curl and ensuring even heat distribution. The natural wood handle promises a cool, comfortable grip during high-heat cooking sessions.
What Makes It Stand Out: This press distinguishes itself through its dual-purpose grooved design that serves both smash burger enthusiasts and traditional grillers. The seven-inch diameter provides ample coverage for larger patties or multiple bacon strips, while the ergonomic wooden handle stays genuinely cool even after prolonged use. Its versatility across cooking surfaces—from campfires to induction stoves—makes it a true multi-tasker.
Value for Money: Positioned in the mid-range for cast iron presses, the EWFEN offers excellent durability that justifies its price point. Comparable single-purpose presses often cost more, while cheaper alternatives compromise on weight and handle quality. The ability to season it like a cast iron skillet extends its lifespan indefinitely, representing genuine long-term value.
Strengths and Weaknesses: Strengths include exceptional heat retention, comfortable heat-proof handle, versatile surface compatibility, and professional grill marks. Weaknesses involve the grooved bottom being less ideal for purist smash burgers (which prefer completely flat surfaces), requiring regular seasoning maintenance, and the 7-inch size potentially overhanging smaller griddles.
Bottom Line: This press excels for cooks wanting versatility beyond just smash burgers. While the grooved surface represents a compromise for smash purists, it delivers outstanding performance for general griddle work, bacon pressing, and grilled sandwiches, making it a solid all-around investment.
7. Cuisinart Smash Burger Kit, Cast Iron Press, Spatula, Seasoning Shaker and Patty Papers for Perfect Cookouts, Barbecues and Tailgates

Overview: Cuisinart’s comprehensive smash burger kit eliminates guesswork by bundling everything needed for perfect patties. The heavy-duty cast iron press flattens meatballs into ideal 6-inch discs, while the sharp-edged stainless steel spatula ensures clean flips. Included patty papers prevent sticking during prep, and a seasoning shaker completes the professional setup.
What Makes It Stand Out: This is the only all-in-one solution from a trusted culinary brand. The integration of purpose-designed accessories—especially the patty papers for mess-free pressing—demonstrates genuine understanding of smash burger technique. Each component works synergistically, transforming home cooking into a streamlined, restaurant-quality experience.
Value for Money: While pricier than standalone presses, the kit’s value becomes apparent when pricing components separately. Comparable quality spatulas, presses, and specialty papers would cost significantly more. For beginners, it eliminates trial-and-error purchasing, potentially saving money on mismatched accessories.
Strengths and Weaknesses: Strengths include complete accessory set, brand reliability, perfectly sized components, and mess-free patty papers. Weaknesses involve the press potentially being lighter than dedicated smash presses for maximum crust development, and seasoned cooks may find the seasoning shaker redundant. The kit approach lacks customization options for individual preferences.
Bottom Line: Ideal for smash burger newcomers, this kit delivers professional results out of the box. The thoughtful accessory selection justifies the premium price, though experienced grillers might prefer selecting heavier individual components. For tailgates and family cookouts, it’s a convenient, reliable package.
8. HULISEN Stainless Steel Burger Press, 6.2 inch Round Burger Smasher, Professional Griddle Accessories Kit, Grill Press Perfect for Flat Top Griddle Grill Cooking

Overview: The HULISEN press brings modern materials to smash burger mastery with its all-stainless steel construction. The 6.2-inch diameter features a flawlessly smooth, flat bottom that creates uniform patty thickness and optimal crust formation. Laser-welded handle technology ensures permanent attachment, while the brushed finish resists sticking and rust.
What Makes It Stand Out: This press uniquely prioritizes convenience without sacrificing performance. Unlike cast iron alternatives, it’s completely dishwasher safe and requires zero maintenance. The smooth bottom surface is precisely what smash burger aficionados demand for maximum surface contact and Maillard reaction, while the stainless steel construction eliminates seasoning concerns forever.
Value for Money: Positioned at a premium price point, the HULISEN justifies cost through durability and time savings. While cast iron presses require ongoing maintenance, this stainless tool remains maintenance-free for life. For busy cooks, the dishwasher-safe feature alone offsets the higher initial investment compared to traditional options.
Strengths and Weaknesses: Strengths include rustproof durability, effortless cleaning, perfect flat surface for smashing, permanent laser-welded handle, and modern aesthetic. Weaknesses involve inferior heat retention compared to cast iron, potentially lighter weight affecting crust development, and higher cost. The metal handle can become warm during extended use.
Bottom Line: Perfect for those prioritizing convenience and low maintenance, this press delivers professional smash burger results with modern ease. While it won’t retain heat like cast iron, its flawless surface and dishwasher-safe design make it an excellent choice for frequent users who value efficiency over tradition.
9. Cuisinart CABP-300 Adjustable Burger Press, Makes 1/4lb to 3/4lb Patties

Overview: The Cuisinart CABP-300 serves a different function entirely—it’s a patty forming press rather than a smash tool. Constructed from pre-seasoned cast aluminum, this device creates perfectly shaped 4.5-inch diameter burgers with adjustable thickness from 1/4 to 3/4 pound. A simple dial mechanism controls patty depth, ensuring consistency across batches.
What Makes It Stand Out: This press excels at portion control and uniformity, solving the common problem of inconsistently sized homemade burgers. The adjustable mechanism is intuitive and precise, allowing chefs to create identical patties for even cooking. Its non-stick surface releases formed patties cleanly, making it ideal for meal prep and freezer storage.
Value for Money: For burger formers, it offers excellent value. The adjustable feature eliminates need for multiple sized presses, while the durable cast aluminum construction ensures longevity. Compared to manual forming or cheaper plastic models, it saves time and reduces waste, quickly paying for itself through consistent portioning.
Strengths and Weaknesses: Strengths include precise portion control, adjustable thickness, consistent results, easy cleanup, and versatility for various meats and veggie burgers. Weaknesses involve being unsuitable for smash burger technique, aluminum being less durable than cast iron, and the fixed 4.5-inch diameter limiting size options. It’s a single-purpose tool for forming, not smashing.
Bottom Line: This is the perfect tool for traditional burger preparation, not smash burgers. If your goal is consistently formed, thick patties for grilling, it’s outstanding. However, smash burger enthusiasts need a flat press for griddle smashing. Know your cooking style before purchasing.
10. Pisol Smash Burger Press, Pre-Seasoned Cast Iron Hamburger Smasher, 2 lb Heavy-Duty Grill Bacon Meat Press Tool with Wood Handle, 6.6”

Overview: The Pisol press delivers exactly what smash burger purists demand: a hefty 2-pound pre-seasoned cast iron tool with a perfectly flat 6.6-inch bottom. The substantial weight does the work for you, creating thin, crispy-edged patties with minimal effort. A natural wood handle provides comfortable, cool-touch operation during high-heat smashing.
What Makes It Stand Out: The pre-seasoned surface sets this apart, offering immediate readiness while maintaining cast iron’s superior heat retention. At nearly 2 pounds, it provides optimal heft for maximum crust development without requiring excessive manual pressure. The flat bottom design ensures 100% contact with the patty, creating the coveted Maillard reaction that defines authentic smash burgers.
Value for Money: This press competes aggressively with premium cast iron options while offering the convenience of pre-seasoning. The weight-to-price ratio is excellent, and the durable construction ensures decades of use with proper care. For dedicated smash burger enthusiasts, it’s a professional-grade tool at a home-cook price point.
Strengths and Weaknesses: Strengths include ideal weight for smashing, pre-seasoned surface, flat bottom design, comfortable wood handle, and versatile griddle compatibility. Weaknesses require typical cast iron maintenance to prevent rust, the handle attachment may loosen over time requiring tightening, and it’s heavier than some users might expect.
Bottom Line: This is a top-tier smash burger press that delivers authentic results. The pre-seasoning and optimal weight make it perfect for both beginners and experienced smash burger fans. If you’re serious about achieving restaurant-quality crust at home, this press deserves serious consideration.
Understanding Burger Press Basics
What Is a Burger Press and Why Use One?
A burger press is a kitchen tool designed to shape ground meat into uniform patties with consistent thickness and diameter. Unlike hand-formed burgers that often end up with uneven edges, air pockets, or inconsistent cooking times, pressed patties deliver professional results every time. The tool typically consists of a base, a pressing plate, and a handle that applies pressure to compact the meat.
For beginners, the primary advantage lies in consistency. When each patty weighs the same and measures the same thickness, they all cook at the same rate—no more guessing which burger needs to come off the grill first. Pressed patties also tend to hold their shape better during cooking, reducing the risk of falling apart or shrinking into odd shapes. This reliability builds confidence in novice cooks and establishes good habits from the start.
Manual vs. Stuffed Burger Presses
Budget presses generally fall into two categories: manual flat patty presses and stuffed burger makers. Manual presses create traditional, flat hamburger patties by simply compressing meat between two plates. These are the most straightforward option for beginners, requiring minimal technique and offering quick cleanup.
Stuffed burger presses, while slightly more complex, allow you to create pockets within the patty for fillings like cheese, jalapeños, or sautéed mushrooms. These tools typically come with a two-step process: first forming the base and sides, then adding fillings and sealing the top. Many budget models under $30 now include interchangeable inserts for both flat and stuffed patties, giving you versatility without the premium price tag.
Key Components of a Quality Press
Every burger press consists of several essential parts that determine its functionality and longevity. The base provides stability and often features a non-stick surface where the patty forms. The pressing plate applies direct pressure to the meat and should align perfectly with the base to create even edges. The handle or lever mechanism controls the pressure application—look for ergonomic designs that won’t strain your hands during repeated use.
Additional features that enhance performance include adjustable thickness settings, which let you customize patty height from thin smash burgers to thick pub-style patties. Some models include parchment paper discs or burger papers to prevent sticking and simplify patty removal. Understanding these components helps you evaluate any press critically, regardless of brand or price point.
Essential Features for Budget-Conscious Beginners
Material Quality and Durability
Even at sub-$30 price points, material quality varies significantly. Heavy-duty plastic presses offer lightweight convenience and dishwasher safety, but may warp over time with high heat exposure. Aluminum models provide excellent heat conductivity and durability while remaining affordable, though they can dent if dropped. Cast iron presses occasionally appear in this price range during sales, offering supreme longevity but requiring more maintenance.
The key is finding a balance between weight and durability. A press that’s too light may not apply adequate pressure, while one that’s too heavy becomes cumbersome. Look for BPA-free plastics and food-grade metals with smooth finishes that won’t harbor bacteria. The construction should feel solid, with no loose parts or flimsy connections that might break after a few uses.
Size and Patty Capacity
Standard burger presses typically create patties ranging from 4 to 5 inches in diameter, perfect for regular hamburger buns. However, beginners should consider their cooking habits before committing. If you frequently make sliders for parties or prefer oversized pub burgers, look for models with interchangeable rings or adjustable diameters.
Thickness capacity matters equally. Some presses limit you to ½-inch patties, while others adjust up to 1½ inches. Think about your preferred burger style—thin, crispy edges require different settings than thick, juicy centers. Many budget presses now include measurement markings inside the mold, helping you achieve consistent patty weights without a kitchen scale.
Non-Stick Coating Considerations
Nothing frustrates beginners more than meat sticking to the press, tearing apart perfectly formed patties. Most budget models feature non-stick coatings, but their quality differs dramatically. Basic plastic presses rely on smooth surfaces, while metal versions often include Teflon or ceramic coatings.
Examine the coating’s durability by checking user reviews for mentions of chipping or peeling. Avoid abrasive scrubbers that can damage the surface, and never use metal utensils to remove patties. Some manufacturers now use diamond-reinforced or titanium-infused coatings that resist scratching better than traditional options. Remember that even the best non-stick surface benefits from a light coating of oil or parchment paper between uses.
Ease of Cleaning and Maintenance
Beginner-friendly tools must clean up quickly and easily. Dishwasher-safe components save time, though hand washing often extends the life of non-stick coatings. Presses with removable plates simplify cleaning significantly, allowing you to wash each part thoroughly.
Consider designs with minimal crevices where meat particles could hide. Single-piece molds are the easiest to clean but may lack versatility. Multi-part presses should assemble and disassemble without tools, with parts that snap together securely. Some models include cleaning brushes specifically designed to reach tight corners—a thoughtful addition that indicates manufacturer attention to user experience.
Handle Design and Comfort
Ergonomic handles reduce hand fatigue when making large batches of patties. Look for wide, contoured grips that distribute pressure evenly across your palm. Rubberized or silicone-coated handles prevent slipping, even when your hands are greasy from handling raw meat.
The handle’s attachment point to the press needs reinforcement—this is a common failure point in budget tools. Riveted or bolted connections outperform simple plastic snaps. Test the handle’s range of motion if possible; it should move smoothly without wobbling or requiring excessive force. Some designs feature leverage mechanisms that multiply your pressing power, making them ideal for those with limited hand strength.
Budget Pricing: What to Expect Under $30
Price vs. Quality Trade-offs
The sub-$30 market segment has improved dramatically, offering features once reserved for premium models. However, realistic expectations matter. At this price point, you won’t find heavy-duty cast iron or sophisticated spring-loaded mechanisms, but you can secure reliable, functional tools that last several years with proper care.
Generally, presses priced between $15-$20 offer basic functionality with decent durability. The $20-$30 range introduces more features like adjustable thickness, multi-patty molds, and better non-stick coatings. Extremely cheap options under $10 often cut corners on material thickness and coating quality, potentially costing more in the long run through early replacement.
Seasonal Sales and Discount Opportunities
Timing your purchase strategically can stretch your budget further. Major retail events like Black Friday, post-Christmas sales, and early summer grilling season promotions often discount kitchen tools by 20-40%. Online marketplaces frequently offer lightning deals on kitchen gadgets, sometimes bringing mid-range presses into the sub-$30 category.
Consider purchasing during off-season months when grilling equipment sees less demand. January through March typically offers the deepest discounts as retailers clear holiday inventory. Sign up for price alerts on comparison websites to catch temporary drops. Some manufacturers offer first-time buyer discounts through their websites, providing another avenue for savings.
Warranty and Return Policies
Even budget purchases deserve protection. Reputable manufacturers stand behind their products with at least a 90-day warranty, with some offering up to two years of coverage. Read warranty terms carefully—many exclude non-stick coating wear, which is often the first component to fail.
Liberal return policies give you the chance to test the press risk-free. Retailers with 30-day satisfaction guarantees allow you to form a few patties and evaluate the tool’s performance. Keep all packaging until you’re certain the press meets your needs. Document any defects immediately with photos, as this speeds up warranty claims significantly.
Patty Styles and Versatility
Classic Flat Patties
The foundation of any burger press’s functionality lies in creating perfect flat patties. Look for models with smooth, flat pressing plates that create even surfaces on both sides of the patty. This ensures consistent contact with the cooking surface, promoting even browning and preventing raw spots.
Some presses include textured plates that create dimples or ridges in the patty. These aren’t just decorative—they help the patty cook more evenly by reducing curling and promoting fat drainage. For smash burger enthusiasts, certain designs allow you to press the patty directly onto a hot griddle, creating those coveted crispy edges through maximum surface contact.
Stuffed Burger Capabilities
Stuffed burger functionality adds tremendous value without significantly increasing cost. These presses typically include a deeper base and a removable insert that creates a well for fillings. The process involves pressing the bottom patty, adding your desired fillings, then pressing a thinner top patty to seal everything inside.
Quality stuffed burger presses create a proper seal around the edges, preventing cheese or other fillings from leaking during cooking. Look for models with clear instructions and possibly online video tutorials. The best designs allow you to adjust filling depth, accommodating everything from a thin layer of blue cheese to a generous pocket of chili.
Slider and Mini Burger Options
Versatility extends beyond full-sized patties. Many budget presses now include interchangeable rings or adjustable molds that create slider-sized portions perfect for parties or portion control. These smaller patties cook faster and allow guests to sample multiple flavor combinations.
Some models feature multi-cavity molds that form several sliders simultaneously, dramatically speeding up prep time for large gatherings. The cavities should be clearly marked with fill lines to ensure consistent sizing. Consider whether the press includes a removal tool for these smaller patties, as their diminutive size can make them tricky to extract intact.
Adjustable Thickness Settings
The ability to customize patty thickness transforms a basic press into a versatile kitchen tool. Look for models with clearly marked adjustment mechanisms—typically screw-down handles or removable spacer rings. These should lock securely at your chosen height without slipping during pressing.
Thickness ranges from ¼-inch for crispy smash burgers to 1½-inch for thick, pub-style patties cover most cooking scenarios. Some presses include measurement guides inside the mold, showing both thickness and weight equivalents. This feature proves invaluable for beginners learning to eyeball portions, ensuring consistency across different meat types and fat ratios.
Material Deep Dive
Plastic Presses: Pros and Cons
Plastic burger presses dominate the sub-$20 category, offering lightweight convenience and typically dishwasher-safe cleaning. High-density, BPA-free plastics resist staining and odors while providing adequate pressing power for occasional use. These models excel in portability, making them ideal for camping trips or small kitchens where storage space is limited.
However, plastic has limitations. It can’t match metal’s durability, and cheaper versions may develop cracks or warp when exposed to high dishwasher temperatures. The non-stick properties depend entirely on surface smoothness rather than coatings, which can degrade over time. For beginners testing the waters, plastic offers an affordable entry point, but plan to upgrade if burger making becomes a regular hobby.
Aluminum Construction
Aluminum strikes an excellent balance between cost, weight, and performance in the budget category. These presses heat up quickly, which can actually help patties release more easily after pressing. The material’s natural corrosion resistance means less maintenance than cast iron, while providing similar durability benefits.
Look for anodized aluminum, which hardens the surface and improves non-stick properties without adding questionable coatings. Thickness matters—presses made from thin aluminum sheets can bend under pressure, while those using 3-4mm thick material feel substantial and perform reliably. Aluminum’s main drawback is potential reactivity with acidic ingredients, though this rarely affects burger making.
Cast Iron Options in Budget Range
While rare under $30, cast iron burger presses occasionally appear during sales or as part of promotional bundles. These heavy-duty tools offer unmatched longevity and develop a natural non-stick patina over time. The substantial weight does the pressing work for you, creating dense, evenly compacted patties with minimal effort.
The trade-off involves maintenance. Cast iron requires seasoning, can’t go in the dishwasher, and rusts if left wet. For beginners willing to learn proper care, however, a cast iron press becomes a lifetime tool that improves with age. Check factory seconds or refurbished options from reputable brands to snag these premium materials at budget prices.
Stainless Steel Elements
Some budget presses incorporate stainless steel components, typically in handles, reinforcing plates, or adjustment mechanisms. This material excels in corrosion resistance and strength, adding durability where it matters most. Full stainless steel presses rarely fall under $30, but hybrid designs offer many benefits at a lower cost.
Stainless steel components should feel solid, not hollow or thin. Check welded joints for smooth finishes that won’t trap food particles. While stainless steel itself isn’t non-stick, its hardness provides an excellent base for durable coatings. These presses often clean easily and maintain their appearance longer than aluminum or plastic alternatives.
Beginner-Friendly Design Elements
Simple Assembly Requirements
The last thing a beginner needs is a complicated tool that requires an engineering degree to assemble. Quality budget presses arrive either fully assembled or snap together in under a minute without tools. Look for designs with clear instruction diagrams and minimal small parts that could get lost.
Presses requiring assembly should include all necessary hardware and possibly a small wrench. The connections must feel secure once tightened—wobbly handles or loose base plates indicate poor manufacturing. Some models feature tool-free disassembly for cleaning, using twist-lock mechanisms that are both secure and convenient.
User-Friendly Operation
Intuitive operation separates frustrating tools from beloved kitchen companions. The best beginner presses work with a simple press-and-release motion, requiring no special techniques or strength. Loading the meat, applying pressure, and removing the patty should each take seconds.
Visual indicators help enormously. Clear fill lines inside the mold prevent overloading, while alignment marks ensure proper assembly. Some models include spring-loaded ejection systems that pop the patty out cleanly—though these add mechanical complexity, they simplify the learning curve. Test the press’s action if possible; it should move smoothly without sticking or requiring excessive force.
Safety Features to Consider
Even simple tools need safety considerations. Rounded edges prevent cuts during cleaning and handling, while stable bases resist tipping during use. Non-slip feet or base pads keep the press stationary on countertops, reducing the risk of accidents with raw meat.
Handles should stay cool to the touch and provide secure grip, even with wet or greasy hands. Avoid presses with exposed springs or pinch points where fingers could get caught. If the press includes removable parts, they should lock securely in place during operation. For stuffed burger models, ensure the sealing mechanism doesn’t require placing fingers near pressure points.
Storage and Space Considerations
Compact storage matters in most kitchens, especially for beginners with limited drawer space. Many budget presses feature nesting designs where components stack together, reducing storage footprint to that of a single large cup. Wall-mountable models offer another space-saving solution, keeping the press accessible without cluttering drawers.
Consider the press’s weight if you plan to store it on upper shelves. Lightweight plastic models store anywhere, while heavier metal presses need sturdy support. Some designs include hanging loops or magnetic backs for convenient refrigerator or grill-side storage. Think about your kitchen’s layout and choose a press that fits your available space without becoming an obstacle.
Performance Factors
Consistency in Patty Formation
The hallmark of a quality burger press is its ability to create identical patties repeatedly. Test this by pressing multiple patties from the same amount of meat—they should match in diameter, thickness, and weight within a few grams. Inconsistent results often stem from loose adjustment mechanisms or warped pressing plates.
Pay attention to edge definition. Clean, sharp edges indicate proper pressure distribution and mold design. Ragged or torn edges suggest the meat is sticking or the press isn’t applying even force. Some presses include removable rings that define the patty’s circumference, producing restaurant-quality results. For beginners, this consistency builds confidence and helps establish reliable cooking times.
Pressure Distribution
Even pressure across the entire patty prevents thin spots that overcook and thick centers that stay raw. Quality presses distribute force through sturdy, flat plates that remain parallel during compression. Look for designs with multiple contact points or reinforced structures that prevent plate flexing.
The handle’s mechanical advantage plays a crucial role. Longer handles or lever systems multiply your input force, creating denser patties without straining your hands. Some models include pressure indicators or adjustable stops that prevent over-compression, which can make burgers tough. For beginners, a press that “bottoms out” at the correct thickness removes guesswork and ensures optimal texture.
Non-Stick Effectiveness
A truly non-stick surface releases patties cleanly without tearing or leaving residue behind. Test this by pressing a patty and observing how easily it lifts out. Quality coatings allow the meat to slide out with minimal assistance, while poor surfaces require scraping or prying that damages the patty’s structure.
The best non-stick performance often comes from a combination of coating quality and design features like slightly tapered molds that release patties naturally. Some presses include ejector plates that push the patty out from below, eliminating sticking issues entirely. For beginners, parchment paper squares provide inexpensive insurance against sticking while you learn the tool’s quirks.
Longevity Expectations
Realistic lifespan expectations help you evaluate value. A well-maintained plastic press should last 1-2 years of regular use before showing significant wear. Aluminum models typically serve 3-5 years, while cast iron can last decades. Coating durability often determines when replacement becomes necessary.
Signs of impending failure include flaking non-stick surfaces, cracked plastic, or loose handles that can’t be tightened. Some budget presses offer replaceable parts, particularly non-stick plates, extending useful life. Store your press properly, clean it gently, and avoid pressing frozen meat or bones that could damage the mold. With reasonable care, even the most affordable press provides years of service.
Common Mistakes Beginners Make
Overpacking the Meat
The most frequent error involves cramming too much meat into the press, expecting it to magically compress into a perfect patty. Overpacked presses create dense, tough burgers that cook unevenly and resist proper searing. The meat needs room to spread naturally under pressure.
Follow fill lines carefully, or start with loosely packed balls of meat that fill about two-thirds of the mold’s depth. The press should close easily without requiring excessive force. If you find yourself straining, remove some meat. Remember that loosely packed patties cook up more tender and juicy than their over-compressed counterparts.
Incorrect Meat Temperature
Pressing ice-cold ground beef straight from the refrigerator leads to cracking and poor adhesion between meat fibers. Conversely, overly warm meat sticks to the press and becomes mushy. The sweet spot lies between 35-40°F—cold enough to handle easily but warm enough to bind together.
Let refrigerated meat sit at room temperature for 10-15 minutes before pressing. For large batches, work with smaller portions, keeping the remainder chilled. If the meat starts sticking, chill the press itself in the freezer for a few minutes. This temperature management separates amateur results from professional-quality patties.
Neglecting Proper Seasoning
Pressing patties before seasoning leads to bland burgers, as salt and pepper can’t penetrate the dense, compressed surface. Season the ground meat thoroughly before pressing, mixing spices evenly throughout. This ensures every bite carries flavor, not just the exterior.
Be careful not to overwork seasoned meat, which can make burgers tough. Mix seasonings gently with your hands just until combined, then press immediately. Some advanced techniques involve pressing first, then seasoning the exterior heavily for a crust—this works for smash burgers but requires experience to execute properly. For beginners, seasoning before pressing guarantees consistent results.
Poor Cleaning Habits
Harsh scrubbing destroys non-stick coatings, while incomplete cleaning leaves bacteria-harboring residue. Never use abrasive pads or harsh chemicals on your press. Instead, soak briefly in warm, soapy water, then wipe clean with a soft sponge or cloth.
Clean your press immediately after use, before meat residue dries and hardens. Pay special attention to crevices around adjustment mechanisms and handle attachments. Dry metal presses thoroughly to prevent rust, and apply a light coat of oil to cast iron models. Proper cleaning habits extend your press’s life dramatically and ensure food safety.
Getting Started with Your First Press
Seasoning Your Press (If Applicable)
Cast iron and some aluminum presses benefit from seasoning, which builds a natural non-stick patina. Start by washing the press in hot, soapy water to remove factory coatings. Dry completely, then apply a thin layer of high-smoke-point oil like flaxseed or canola. Bake upside down in a 375°F oven for an hour, placing foil below to catch drips.
Repeat this process 2-3 times for optimal results. After each use, clean gently without soap, reheat to ensure dryness, and apply a light oil coating. This maintenance creates a slick surface that improves with age. Never season plastic components, and check manufacturer guidelines—some modern coatings require no seasoning at all.
Choosing the Right Ground Meat
Fat content dramatically affects patty performance. An 80/20 blend (80% lean meat, 20% fat) provides the ideal balance of flavor and structure for pressed burgers. Leaner mixes produce dry, crumbly patties, while fattier blends can cause excessive shrinkage and flare-ups.
Consider meat texture as well. Coarsely ground beef creates looser, more tender patties, while fine grinds produce denser textures. For beginners, standard grocery store 80/20 ground chuck offers reliable results. Experiment with blends adding short rib or brisket for flavor once you’ve mastered basic pressing techniques. Always keep meat cold and handle it minimally to prevent toughness.
Forming the Perfect Patty
Start with a loosely packed ball of meat, roughly the size of a golf ball for standard burgers. Place it in the center of the press base, ensuring it’s not touching the sides. Lower the pressing plate slowly and evenly, applying steady pressure until you feel resistance. Hold for 2-3 seconds, then release smoothly.
If your press includes an ejector, use it to lift the patty out cleanly. Otherwise, gently invert the press and tap the base to release. The patty should slide out intact with defined edges. Practice with a few test patties to learn the optimal pressure and timing for your specific press and meat blend.
Cooking Tips for Pressed Burgers
Pressed patties cook differently than hand-formed ones due to their uniform density and lack of air pockets. They typically require 30-60 seconds less cooking time per side. Preheat your cooking surface thoroughly—pressed patties sear best on hot griddles or grills.
Resist the urge to press down on patties during cooking; they’ve already been compressed. Flip only once, using a thin spatula that slides easily under the evenly formed edges. For cheeseburgers, add cheese during the last minute of cooking and cover to melt. Let patties rest for 2-3 minutes after cooking to redistribute juices before serving.
Frequently Asked Questions
How long should a budget burger press last with regular use?
A quality budget press should serve you well for 2-3 years of weekly use. Plastic models may show wear sooner, while aluminum versions often last longer. Proper cleaning and storage significantly extend lifespan—avoid dishwashers if possible, clean promptly after use, and store in a dry place. Replace your press if the non-stick coating flakes, handles loosen irreparably, or cracks develop in the mold.
Can I use a burger press for vegetarian or plant-based patties?
Absolutely, though results vary by recipe. Bean or vegetable-based patties often stick more than meat, so use parchment paper liners generously. Plant-based ground meats like Beyond or Impossible perform similarly to beef and press beautifully. Adjust pressure gently for delicate mixtures, and consider chilling the press before use to prevent sticking. Clean thoroughly between meat and vegetarian uses to avoid cross-contamination.
What’s the ideal patty thickness for different cooking methods?
For grilling, ¾-inch patties offer the best balance of charred exterior and juicy interior. Stovetop cooking suits ½-inch to 1-inch thicknesses, depending on your heat level. Smash burgers should be pressed to ¼-inch directly on the hot cooking surface. Thick 1½-inch patties work best for oven-finishing after searing. Your press’s adjustability determines which styles you can achieve reliably.
Should I press my patties ahead of time or just before cooking?
Press patties no more than 24 hours ahead, storing them between parchment paper in an airtight container in the refrigerator. Pre-pressing saves time during busy cookouts but can lead to slightly drier burgers if held too long. For maximum juiciness, press and cook within 30 minutes. Never freeze pressed raw patties unless separated by parchment, as they stick together irreparably.
How do I prevent meat from sticking to my press?
Start with well-chilled meat and a clean, dry press. Lightly oil the press surfaces or use parchment paper rounds cut to fit the mold. Some cooks dust the meat ball lightly with flour or cornstarch before pressing. If sticking persists, chill the press in the freezer for 10 minutes before use. Avoid washing the press between every patty—simply wipe clean with a damp cloth to maintain the developing patina.
Is it worth buying a stuffed burger press as a beginner?
Stuffed burger presses offer excellent value, often costing only slightly more than flat presses while providing dual functionality. They let you experiment with creative fillings once you’ve mastered basic patties. The learning curve is minimal—most beginners succeed on their first attempt. Look for models that convert easily between flat and stuffed modes, giving you maximum versatility without cluttering your kitchen.
Can I press frozen ground meat directly?
Never press fully frozen meat—it can damage your press and produces poor results. However, partially thawed meat (still firm but pliable) works fine and actually releases from the press more easily. Thaw meat in the refrigerator until it’s just soft enough to indent with your finger, typically 1-2 hours for a pound of beef. This state offers the best texture for pressing and cooking.
How many patties can I realistically make in 30 minutes?
With practice, you can press 20-30 patties in 30 minutes using a single standard press. Multi-cavity slider presses can double or triple that output. The process speeds up dramatically once you develop a rhythm: grab meat, form a ball, press, remove, repeat. Pre-cut parchment squares and pre-measured meat portions streamline the workflow. For large events, consider pressing patties the day before to avoid last-minute stress.
What’s the best way to store burger presses long-term?
Clean and dry the press thoroughly before storage. For metal presses, apply a light coat of food-grade mineral oil to prevent rust. Store in a cool, dry place away from direct sunlight, which can degrade plastic and coatings. If storing for months, wrap in a breathable cloth rather than sealing in plastic, which can trap moisture. Check the press before seasonal use, re-seasoning cast iron if needed.
Are there any foods I should avoid pressing in a burger press?
Avoid pressing foods with large chunks or hard pieces that could damage the mold—this includes ground meat with bone fragments, large vegetable pieces, or partially cooked ingredients. Extremely lean meats (93/7 or leaner) press poorly and crumble when removed. Very sticky mixtures like some gluten-free veggie patties may require extensive modifications. When in doubt, test a small batch first before committing to a full recipe.
See Also
- 10 Best Budget Hamburger Presses Under $30 for Beginners in 2026
- 10 Best Spring-Loaded Burger Presses for Effortless One-Hand Use in 2026
- 10 Game-Changing Lever Burger Presses for Effortless Burger Making in 2026
- 10 Best Burger Presses for Fast and Even Cooking This Year
- How to Solve Uneven Patty Thickness with the 10 Best Adjustable Burger Presses in 2026